Complete space-builder tutorial

Grapevine space builder is an easy-to-use 3D design tool that allows you to build custom 3D spaces where you can chat, hang-out, and collaborate with others. We have worked hard to strike a balance between usability and flexibility allowing our users to design beautiful custom 3D spaces with ease.
If you’re looking to get going with Grapevine space builder then this is a great place to start! In this tutorial, we run through the basics of Grapevine space builder, we assume you have already created your space and you are in the builder environment (if you’re not sure how to create your space check out getting started).
Camera and global space settings
The first tool in the left hand panel allows you to control the camera. With left and middle click you can pan up and down your space layout, with the scroll wheel you can also zoom in and out of the space. Also, with this tool selected, some special tools appear in the bottom panel.
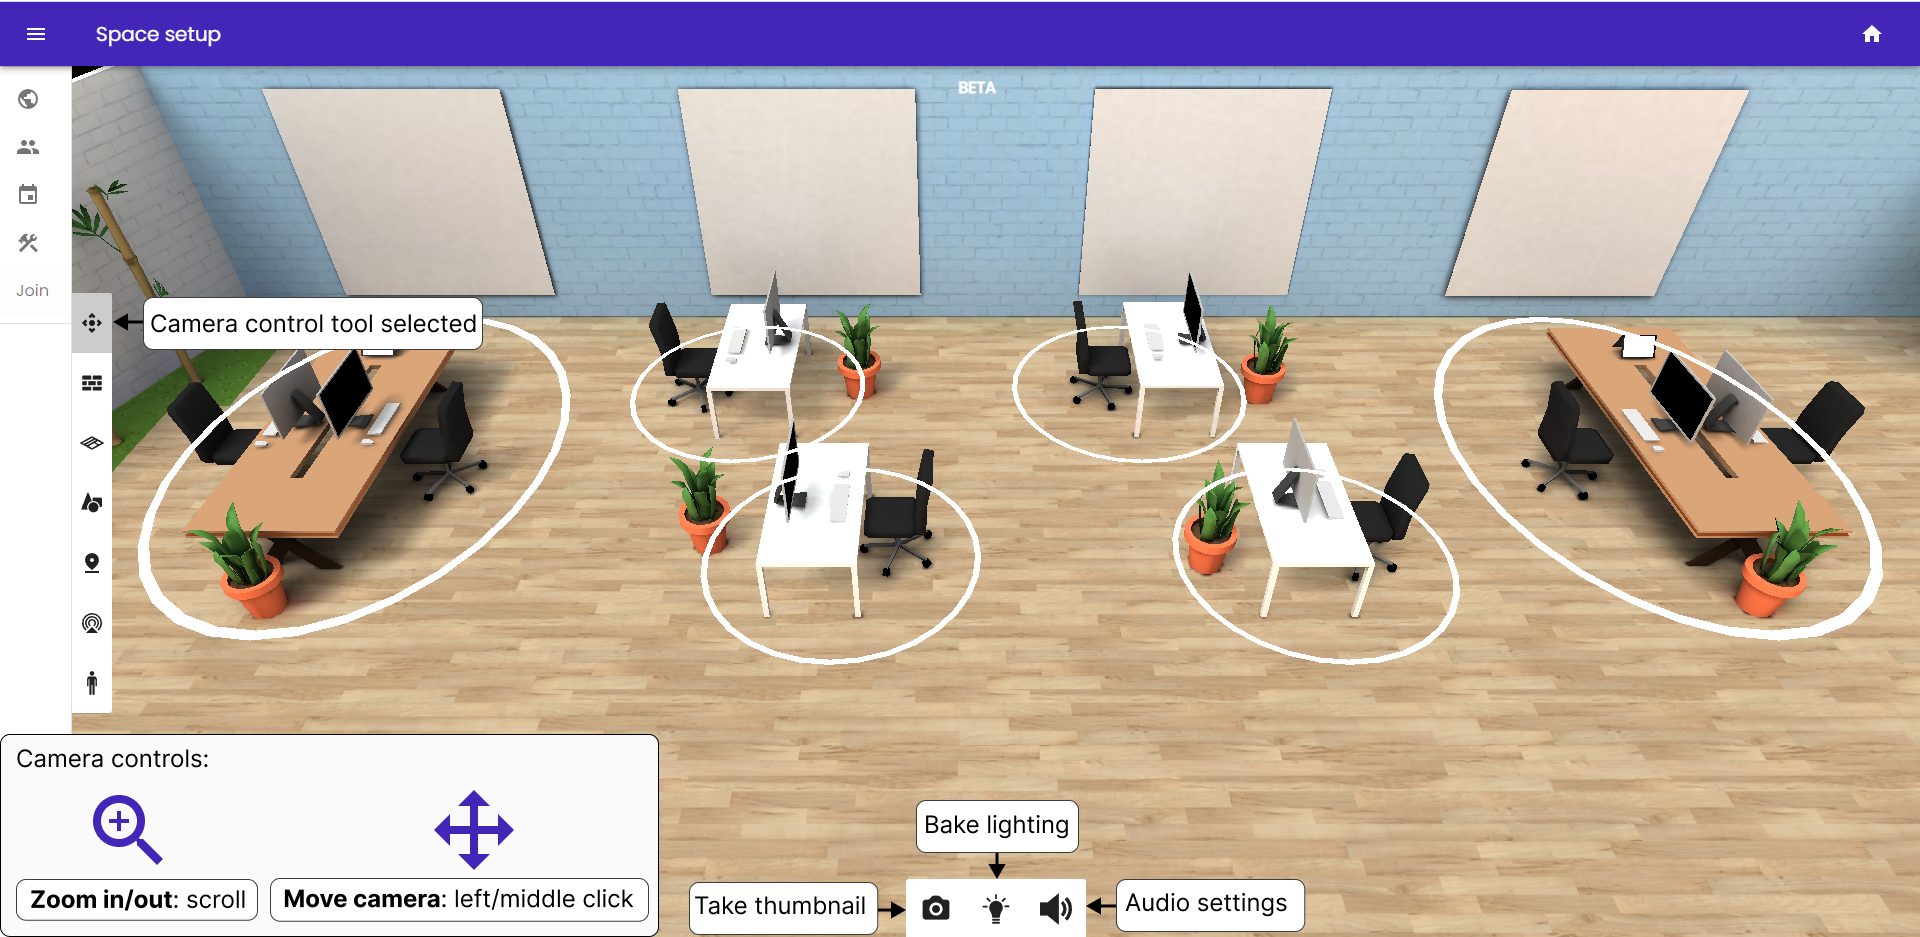
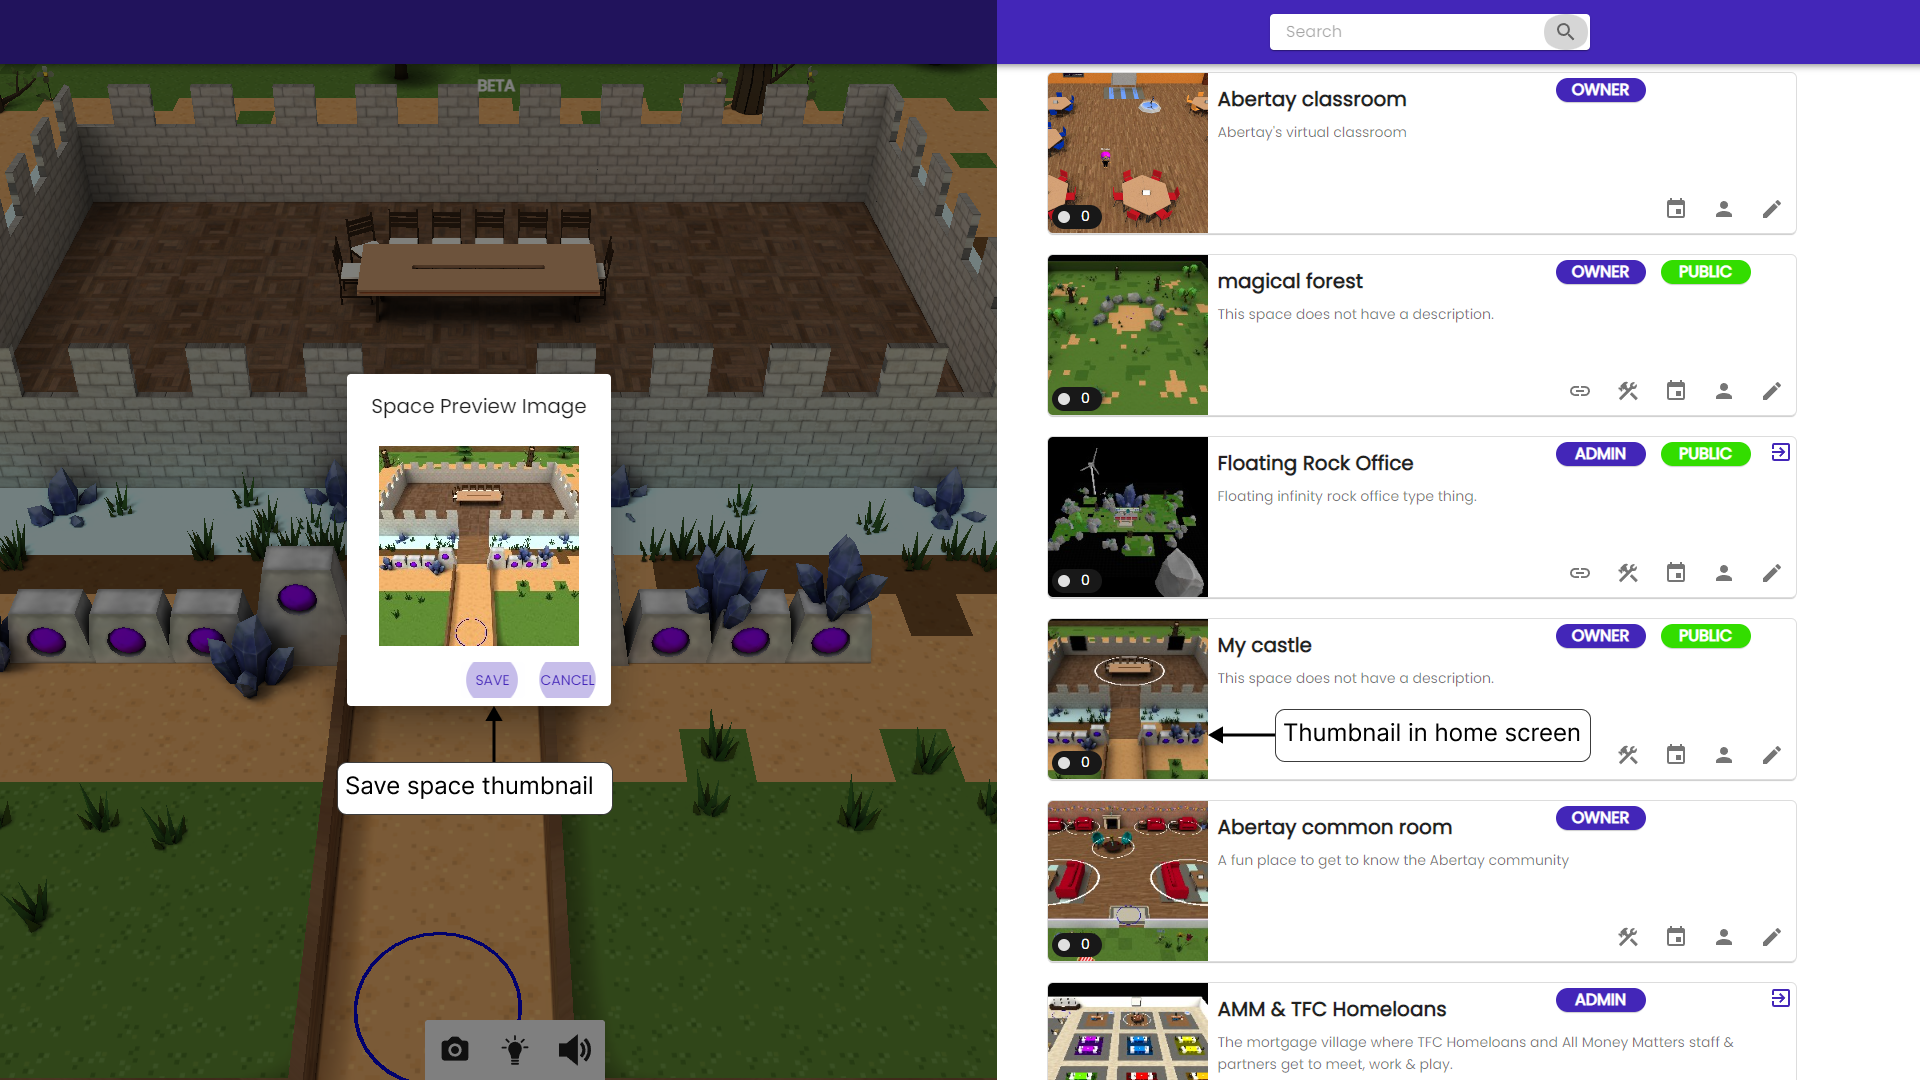
Take thumbnail: The camera button on the left hand side allows you to save a thumbnail image for your space, it captures the camera’s current view meaning you can try different views until you are happy with the result. The thumbnail makes it easier to find your space in the home screen and other menus.
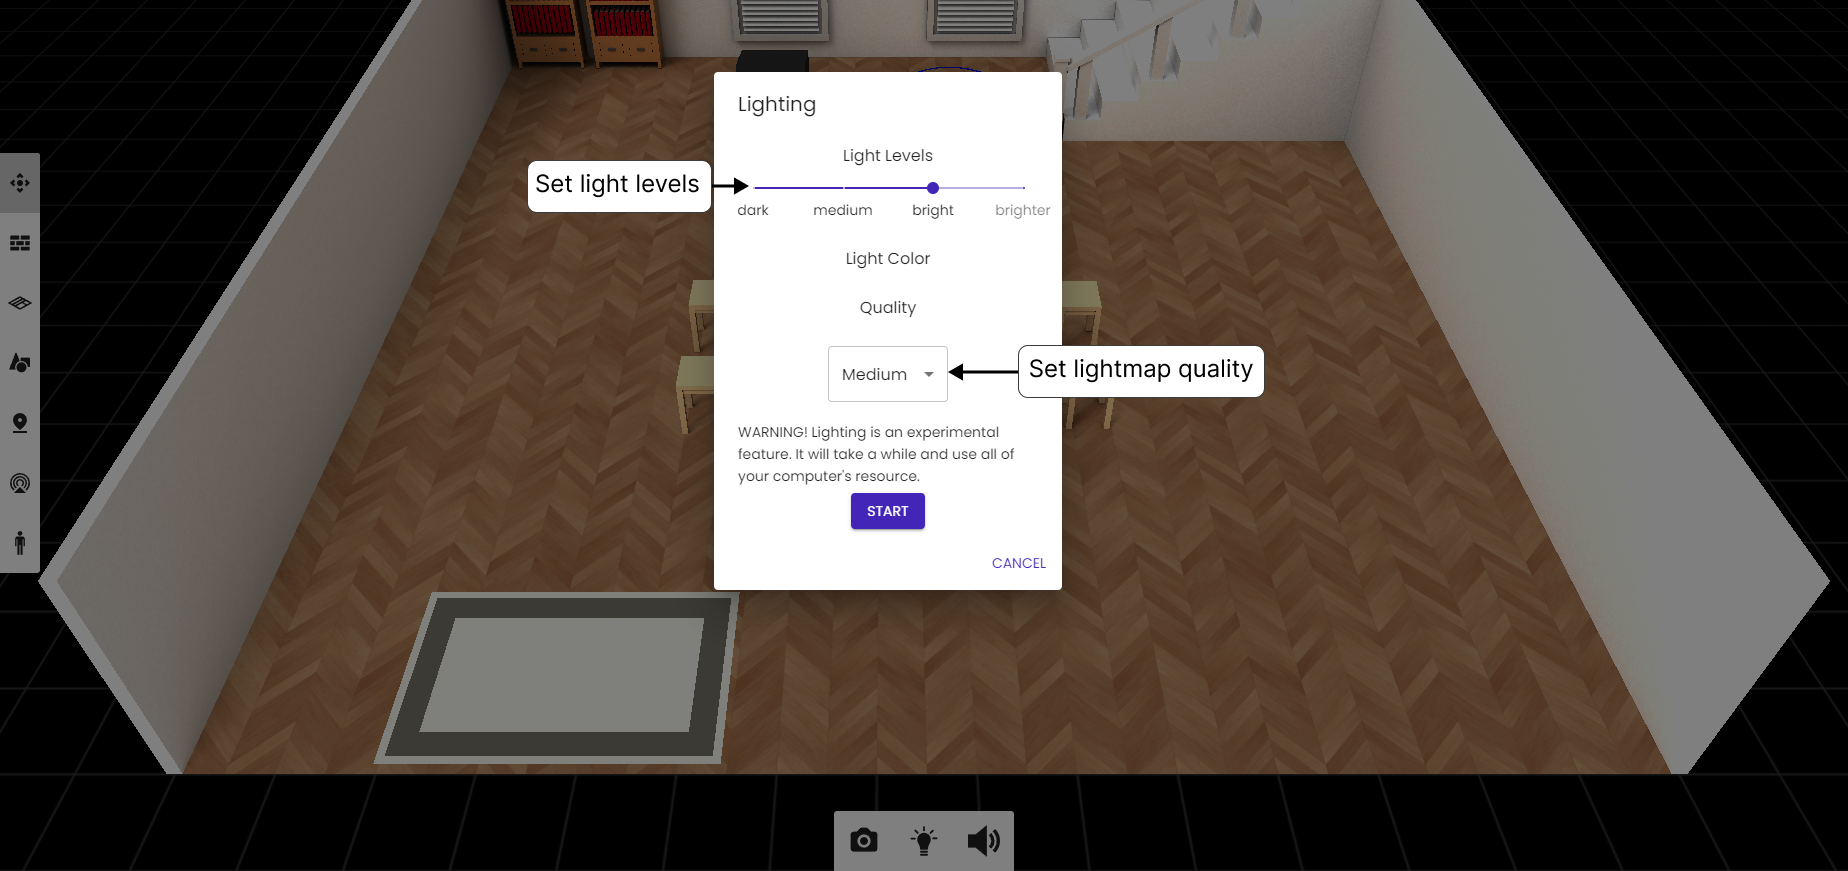
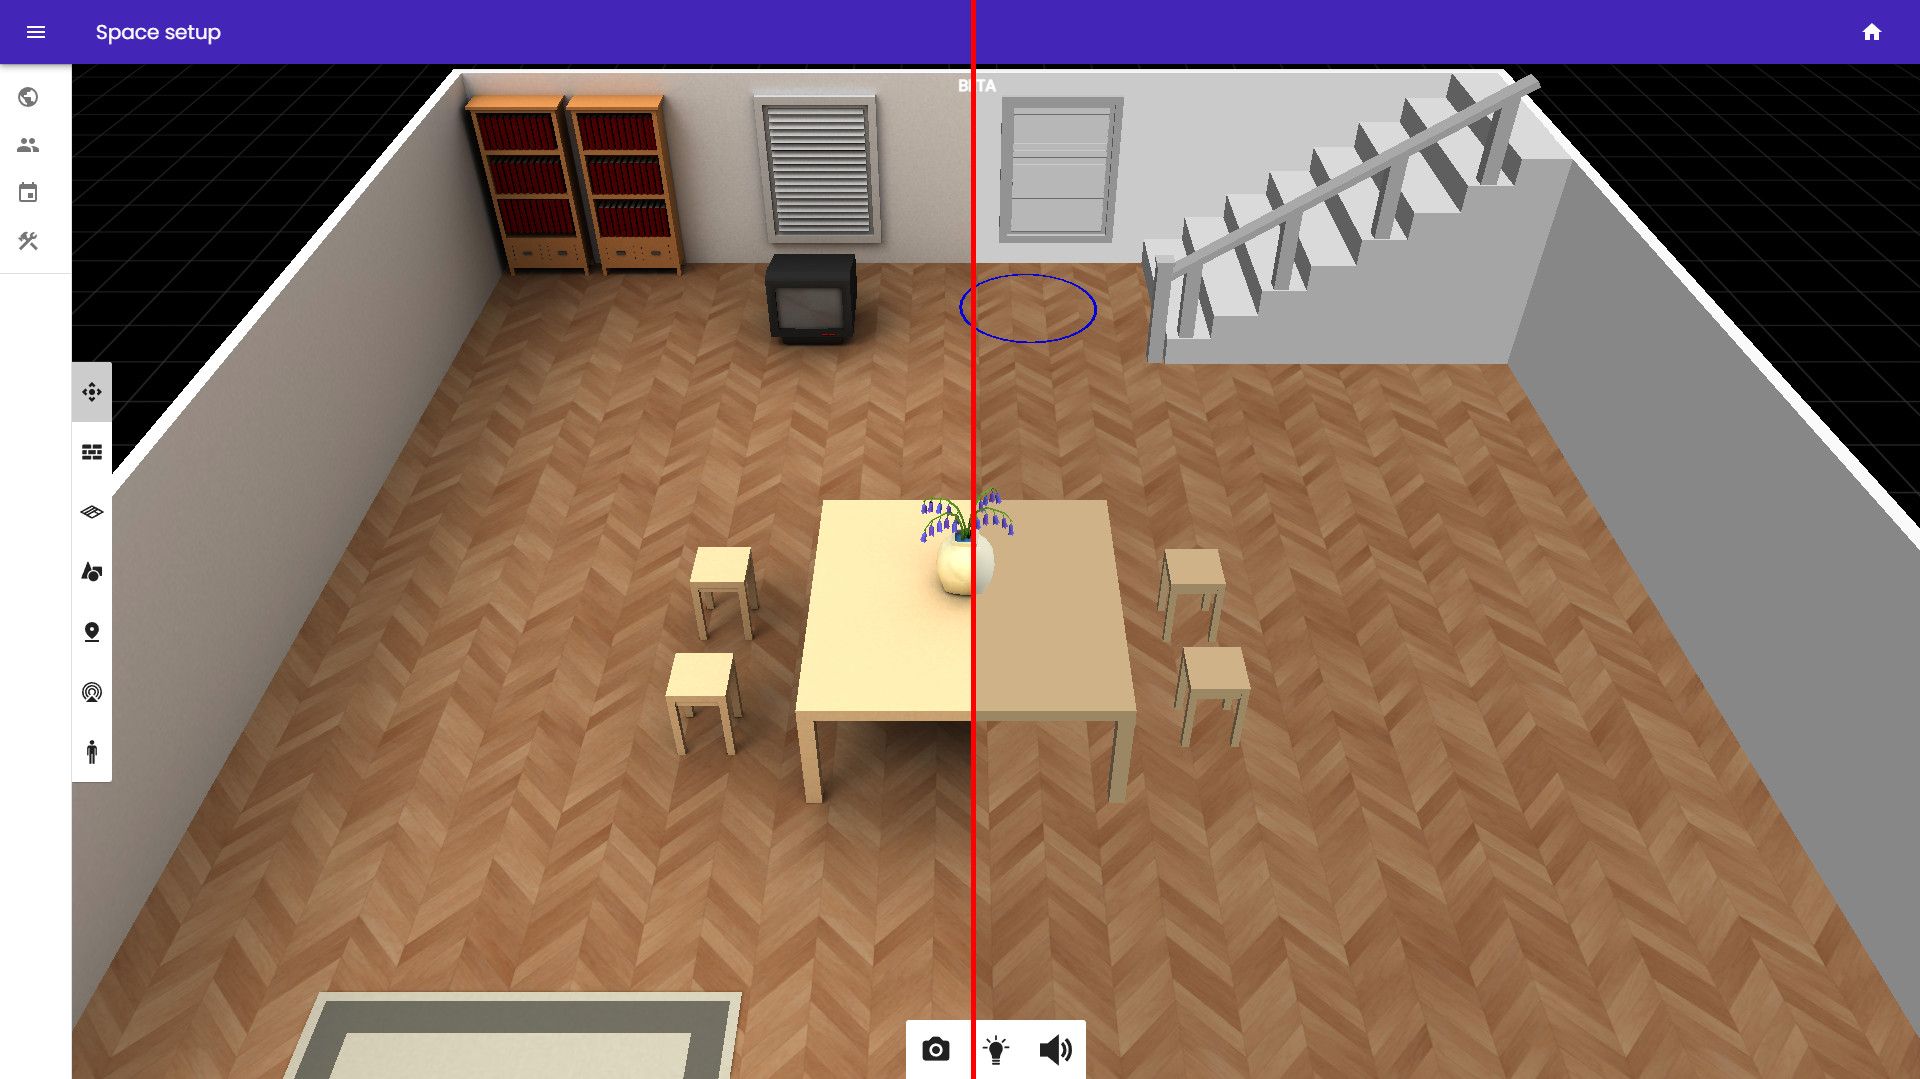
Bake lighting: The lightbulb button opens the lighting menu, you can use this tool to add realistic lighting to your space. You can set the lightmap quality and the light levels. Lower quality will bake faster but will be more grainy! Once you’re ready to go hit start, depending on the speed of your machine this can take a few minutes so best to wait until you’re happy with your design before lighting.
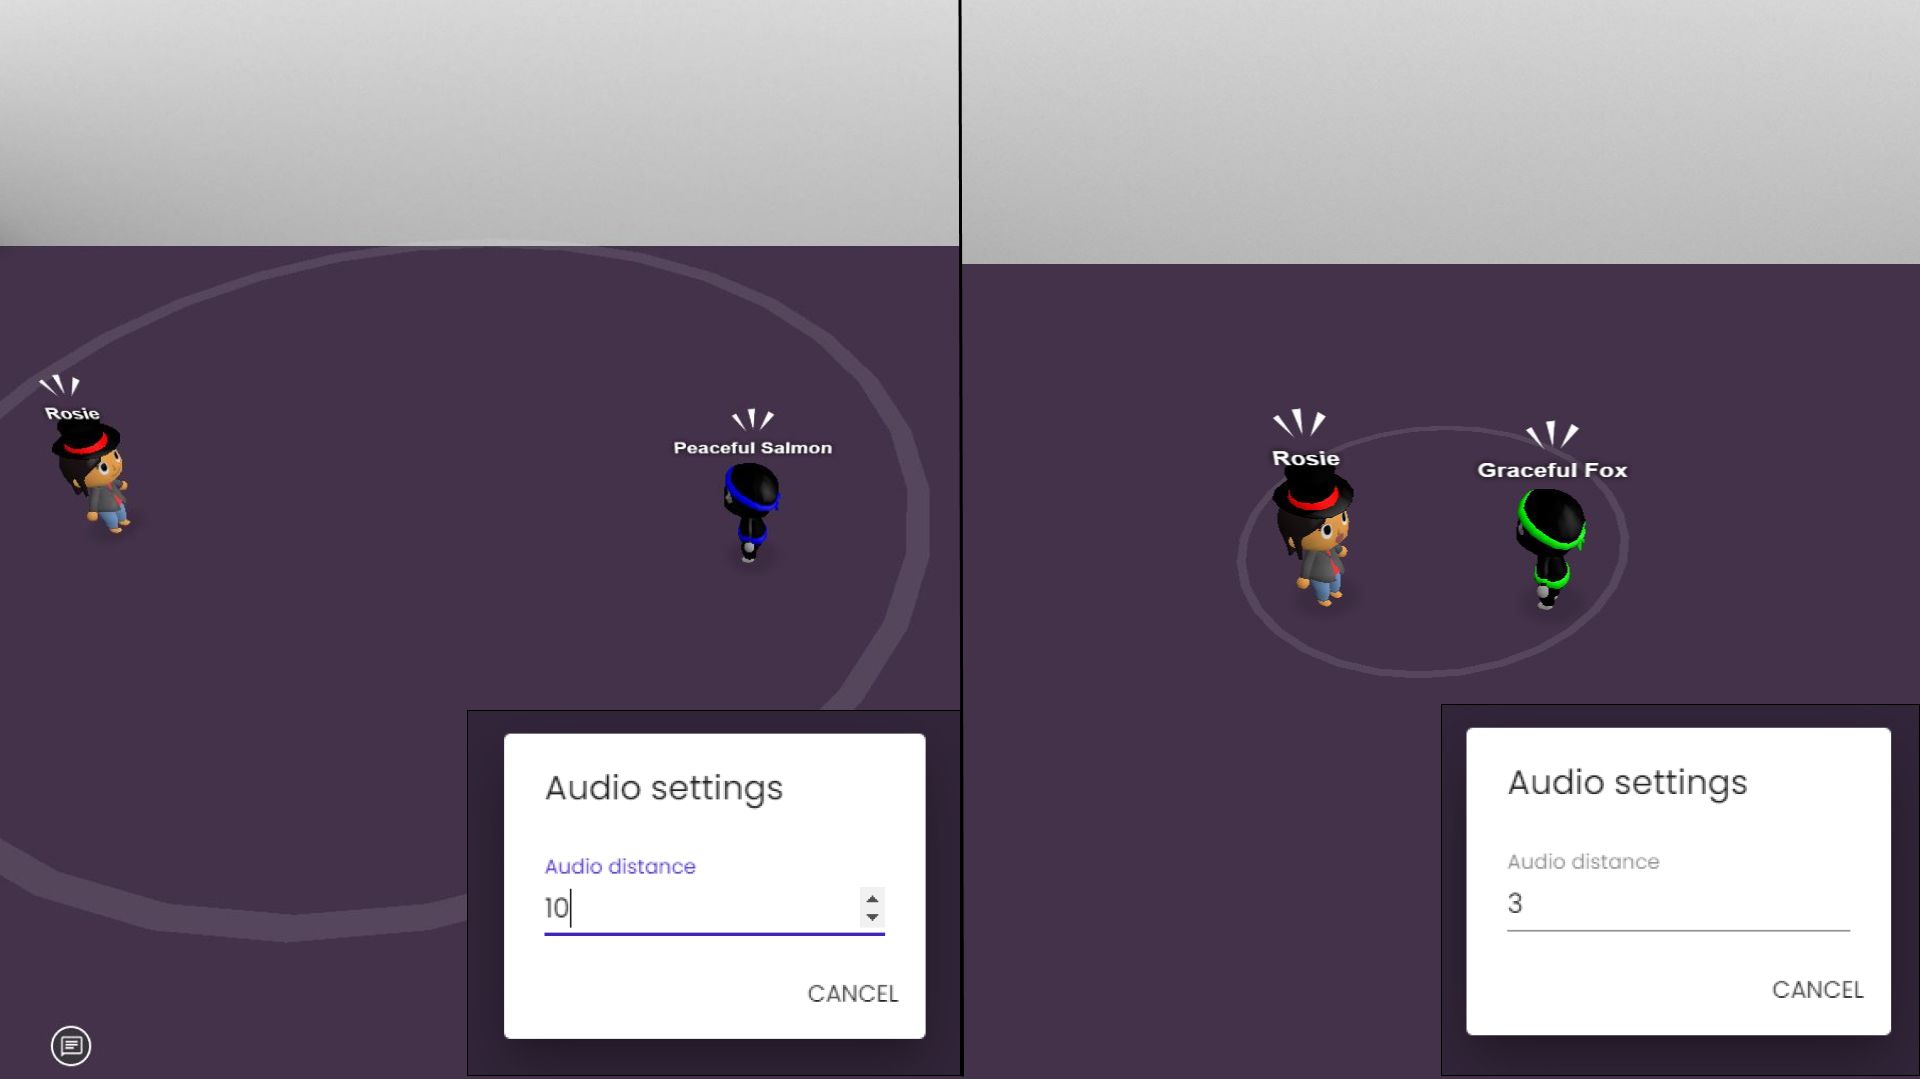
Audio settings: The speaker symbol on the right allows you to adjust the maximum radius of the audio range in your space, i.e. how far away you can hear others. 6 metres is the default however you might want to adjust this to a size that suits your space.
Walls
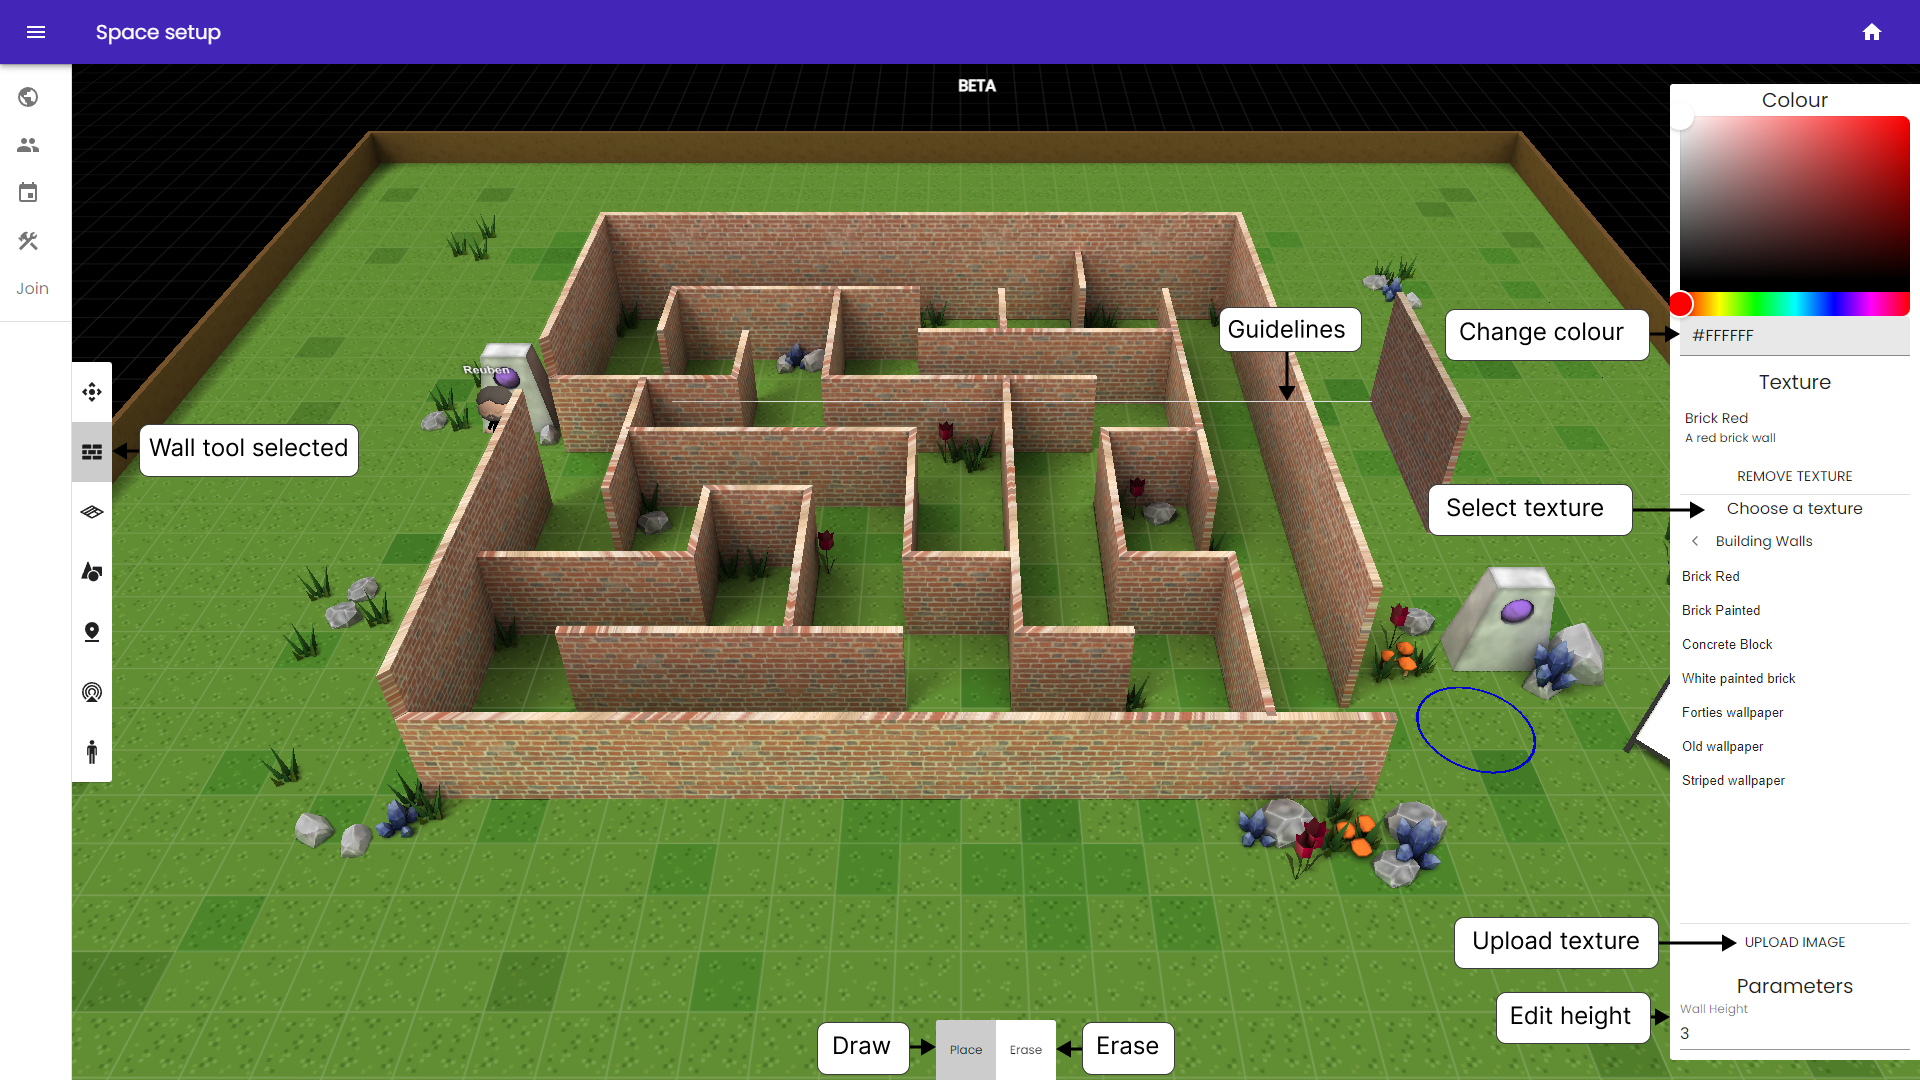
You can add walls to your space using the wall tool. Walls add a solid boundary to spaces and can be used to partition spaces into multiple rooms if you like. Walls are drawn in straight lines and snap to the edges of the main grid. The bottom panel allows you to toggle between placing an erasing walls, to erase a wall you simply hover over the wall you want to delete, when it highlights red you can click to erase it.
The side panel allows you to change the properties of your walls, including colour, texture and wall height! You can even upload your own textures and apply them to walls.
Floors
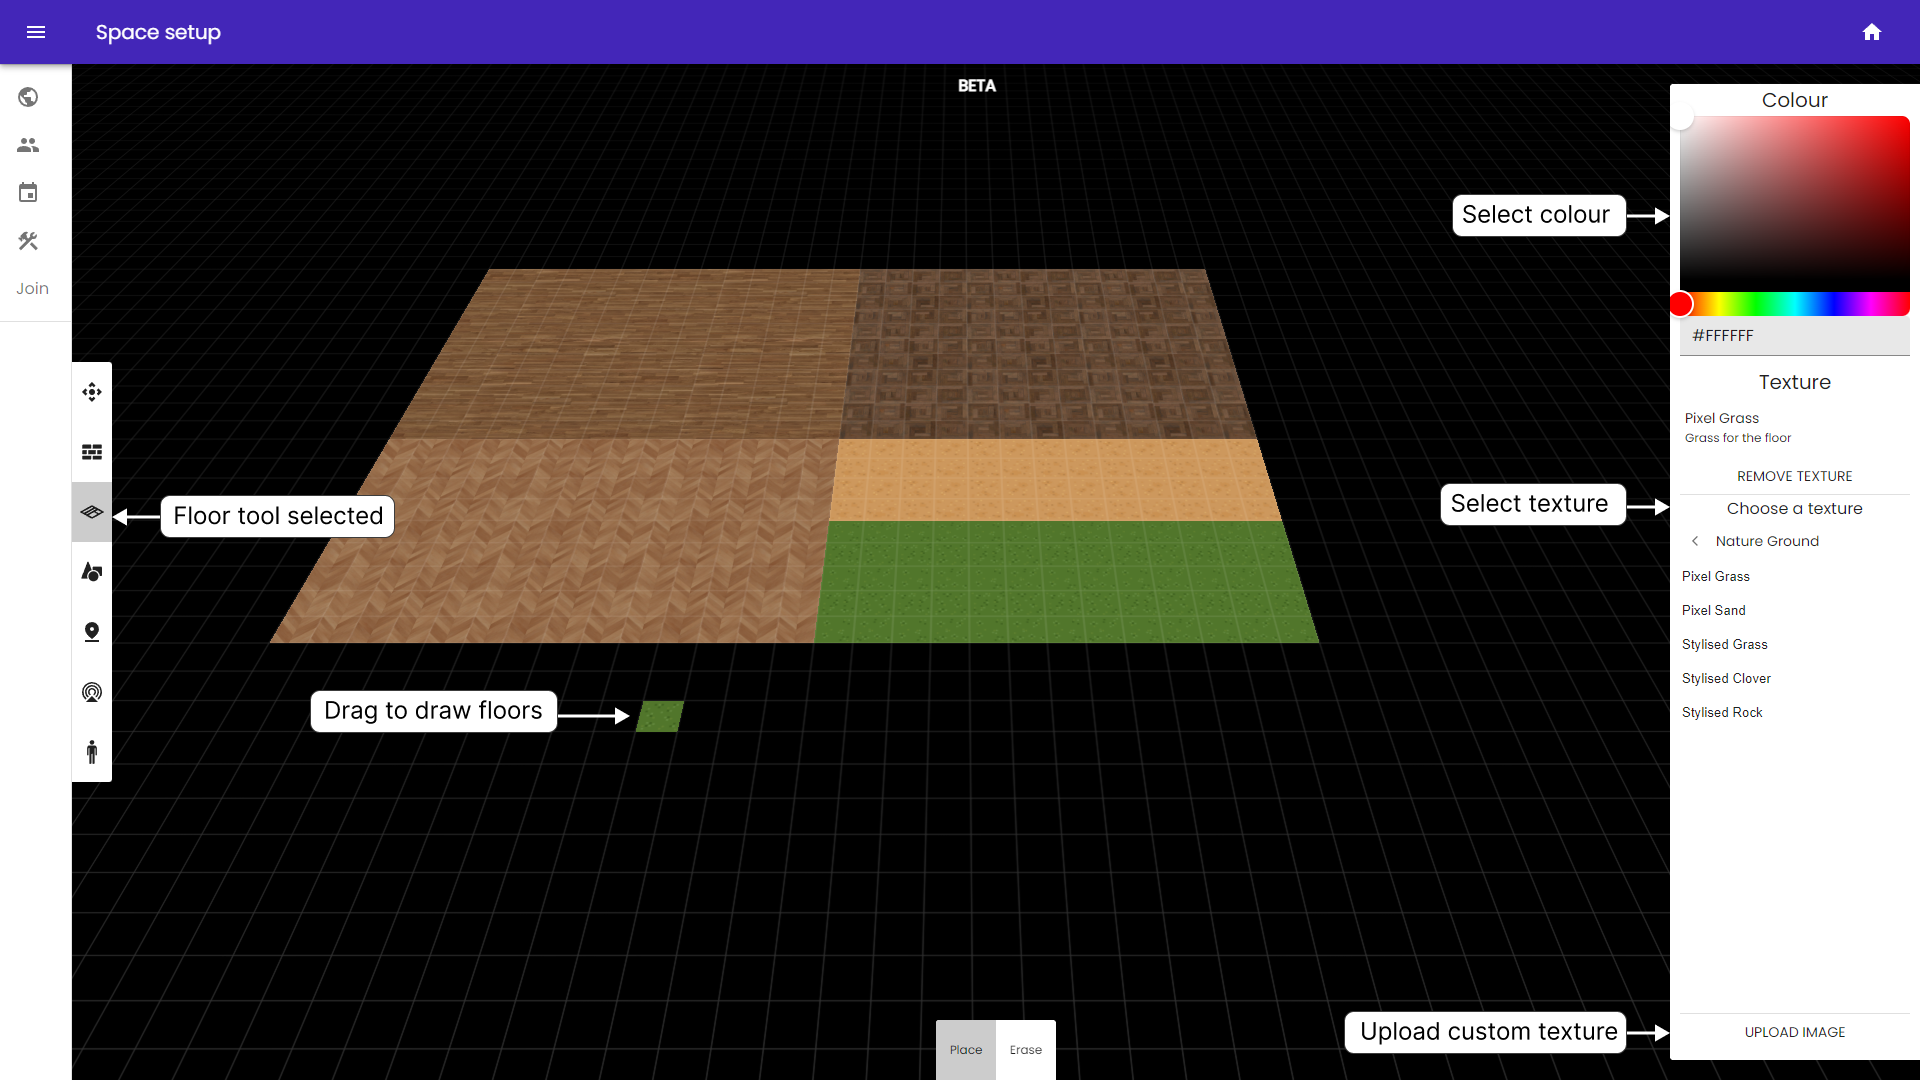
The floor tool allows you to draw floors into your space, you can click and drag to add the amount of floor you need. Each grid square is approximately 1x1 metre in world space.
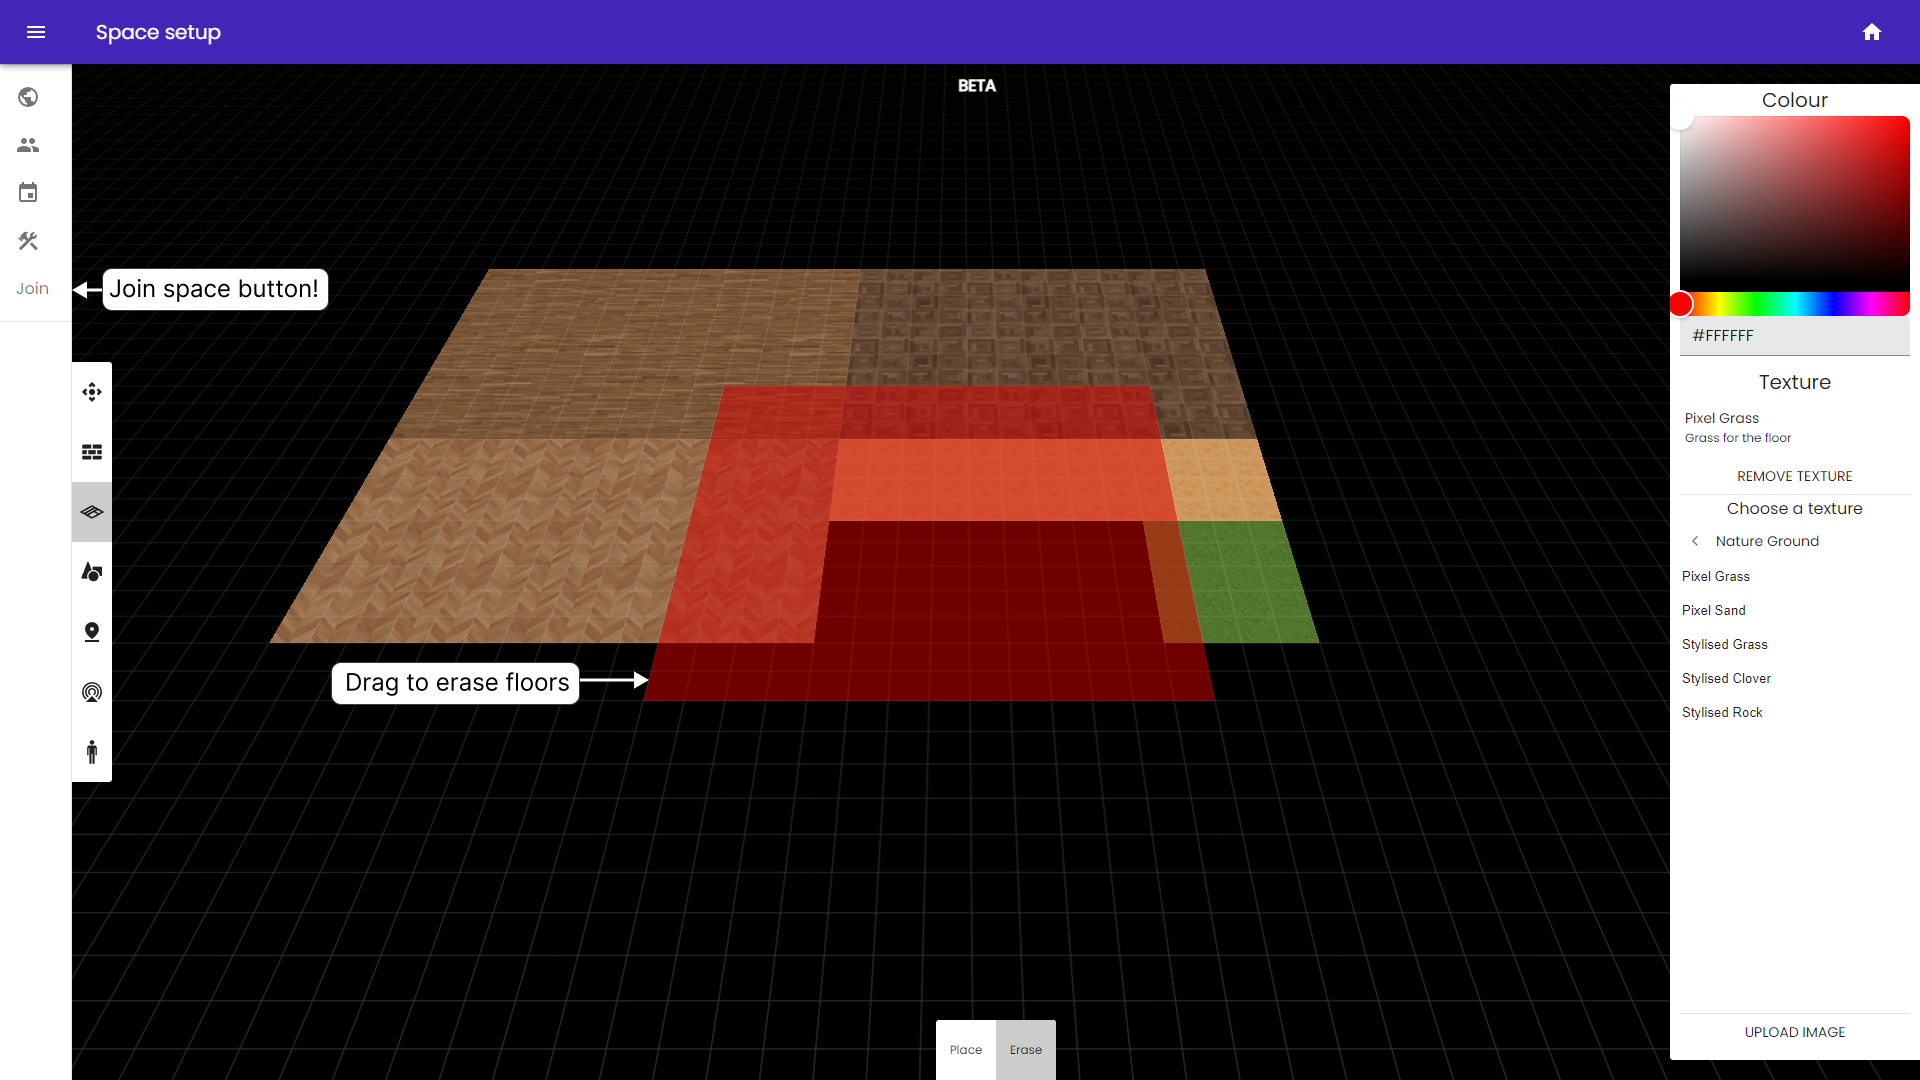
You can erase floor and update floor properties like in the wall tool. If you’re unsure about how big the space is, you can quickly jump into the space to test by the join button in the space set up panel.
Object Library
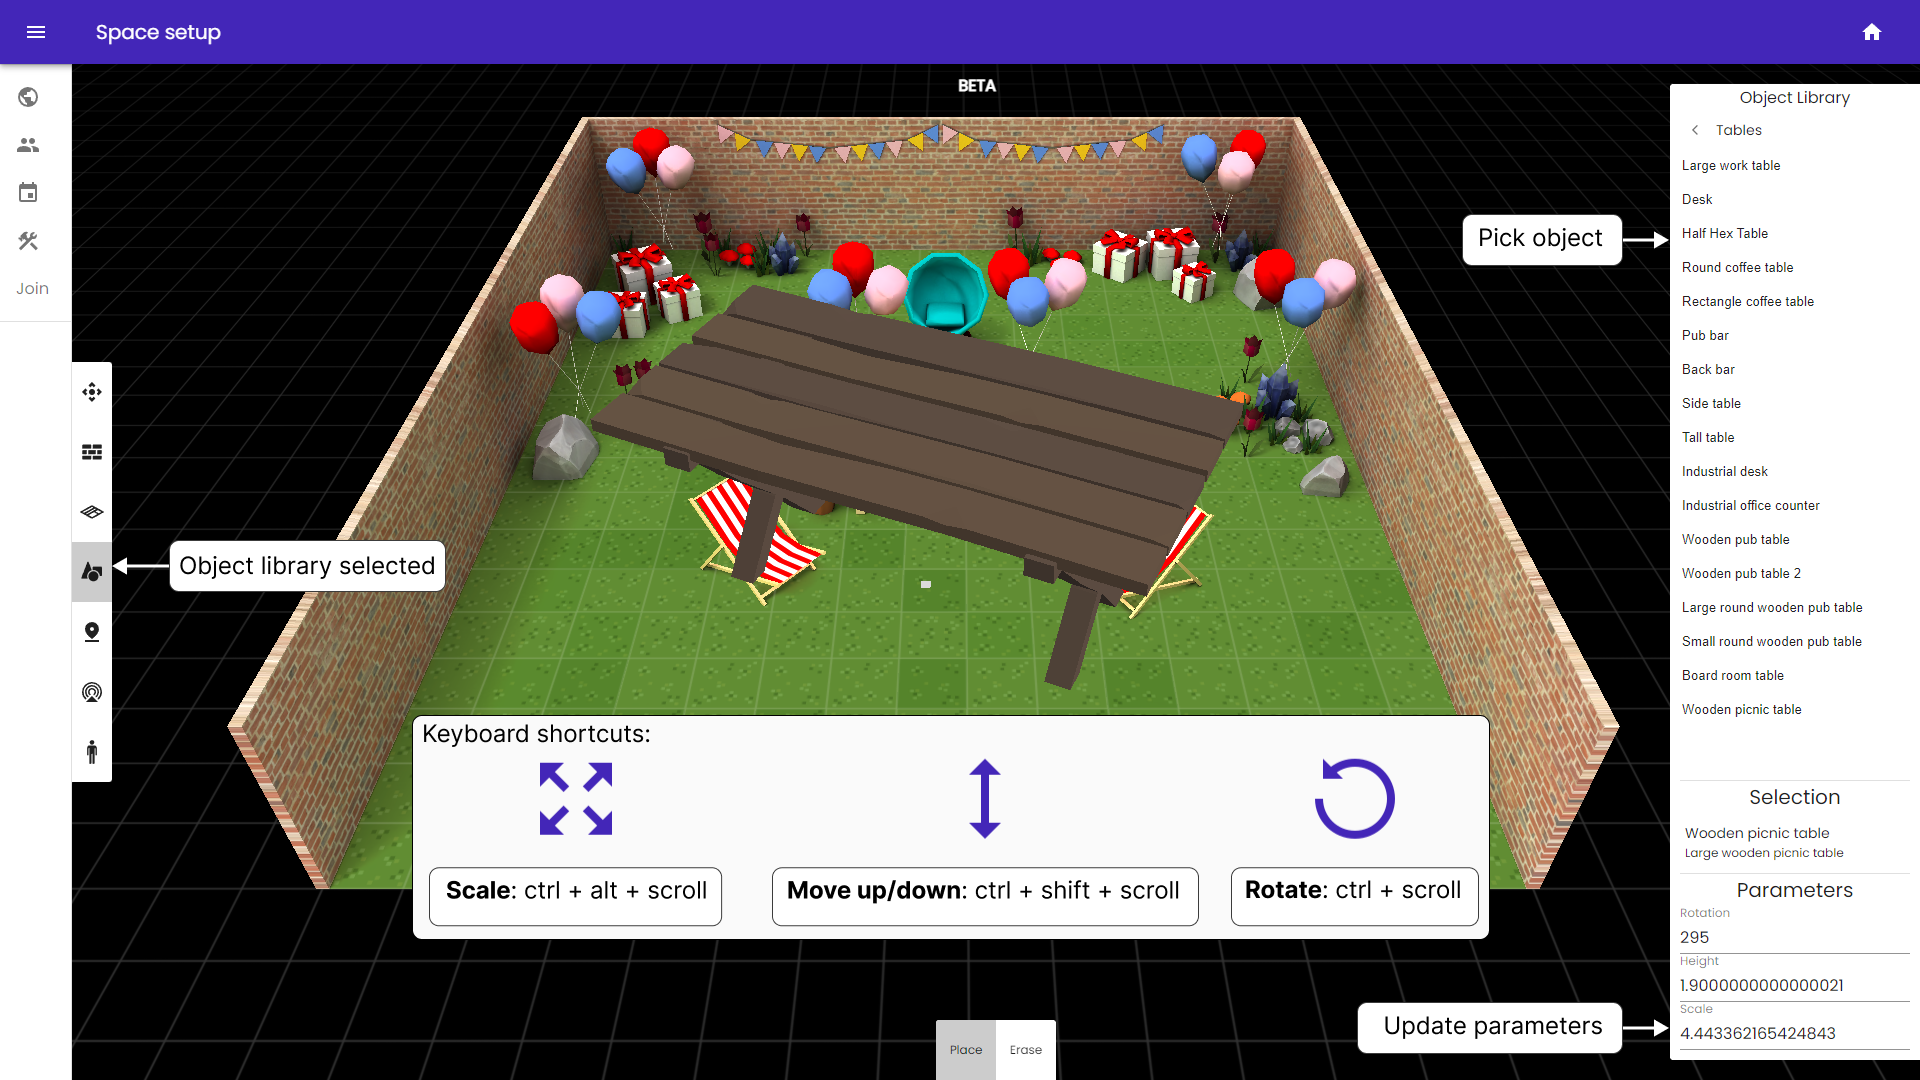
Once you’ve added floors and walls to your space it’s time to decorate with some objects! If you click on the object tool, the object library appears with a list of categories. Pick a category to see all of the available objects. Once you have selected your object you can edit the size, rotation, and height in the side panel, or by using keyboard shortcuts: rotation (ctrl+scroll), scale (ctrl+alt+scroll), height (ctrl+shift+scroll). You can also change the colour of certain objects.
To delete an object select erase from the bottom panel and click in the object you want to remove.
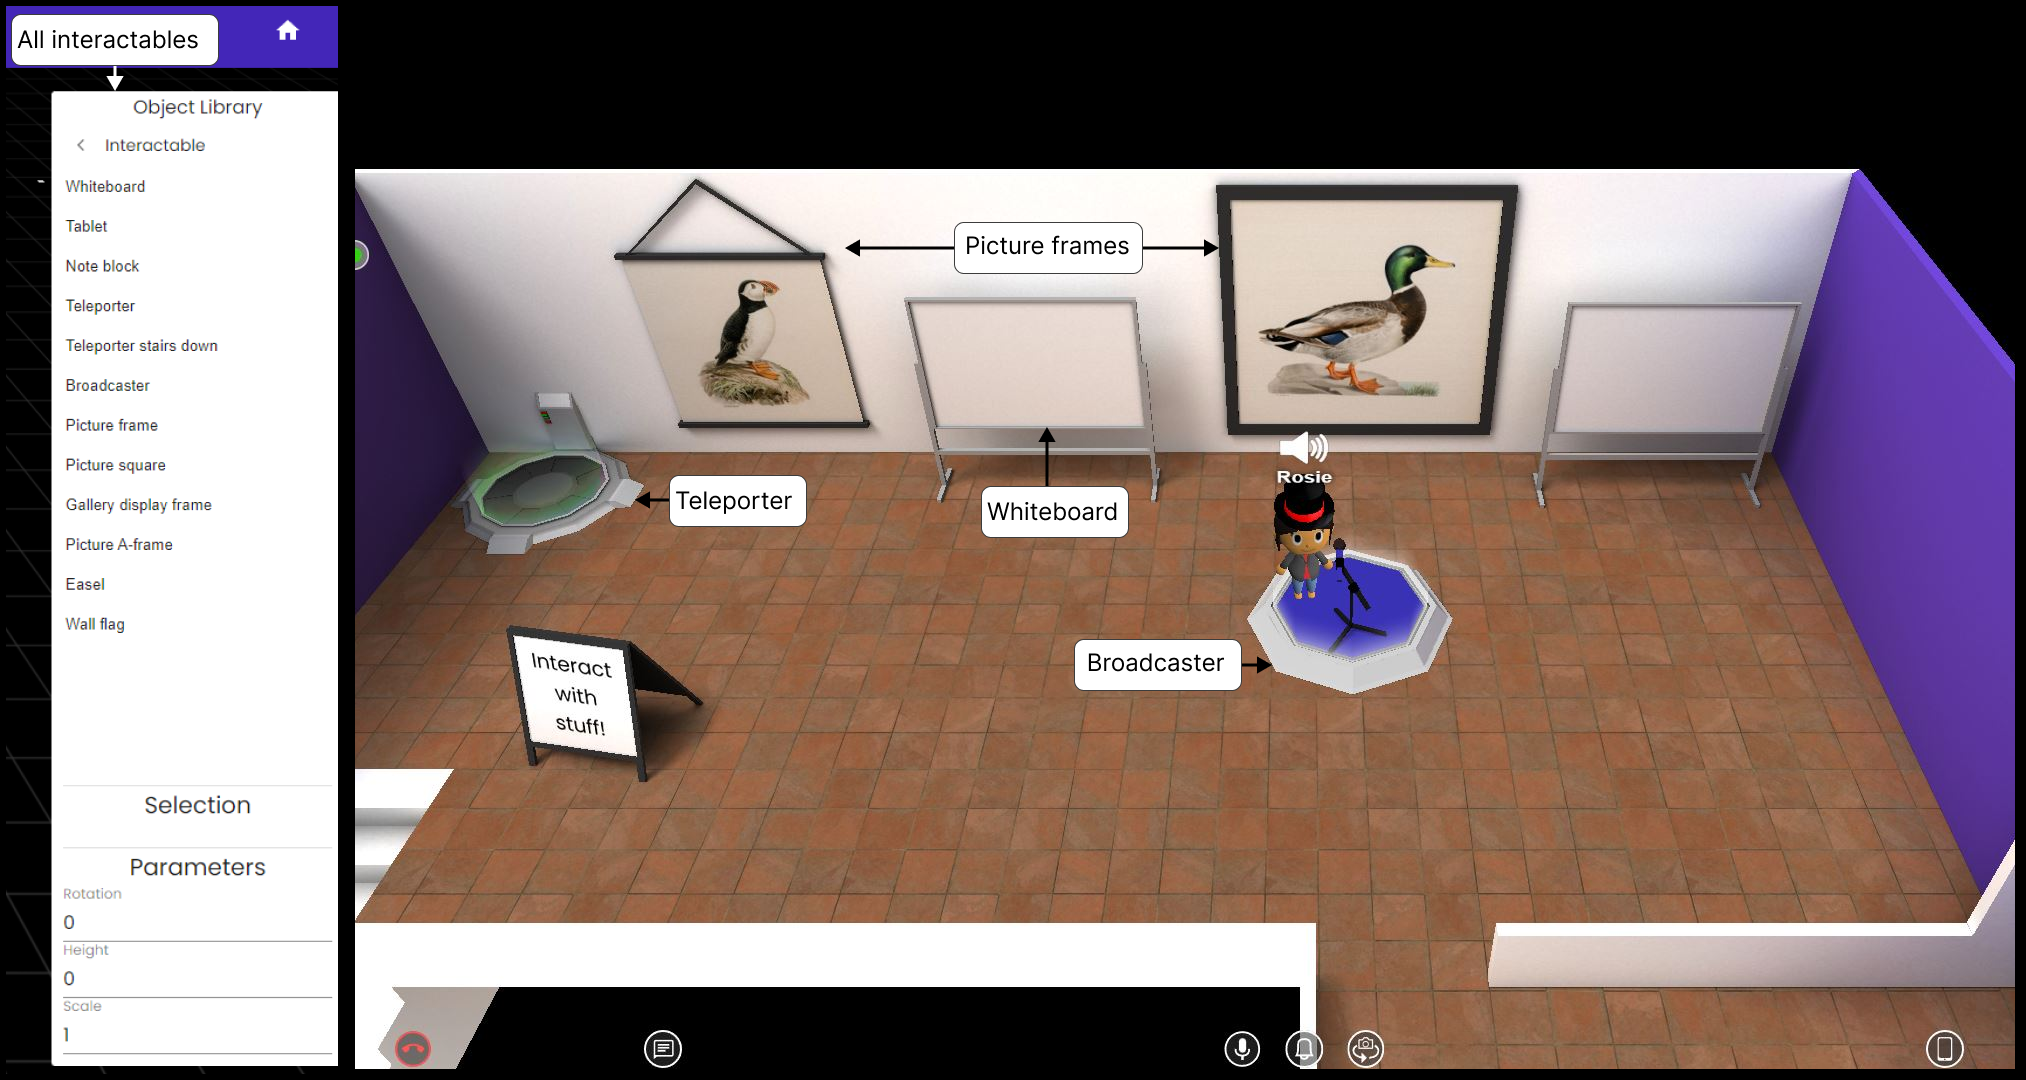
Interactables: There is a special category of objects called interactables. These are objects that you can click on and interact with, such as whiteboards, picture frames, note pads, teleporters, and audio broadcasters. Head to the interactables category to test them out!
Drop zones
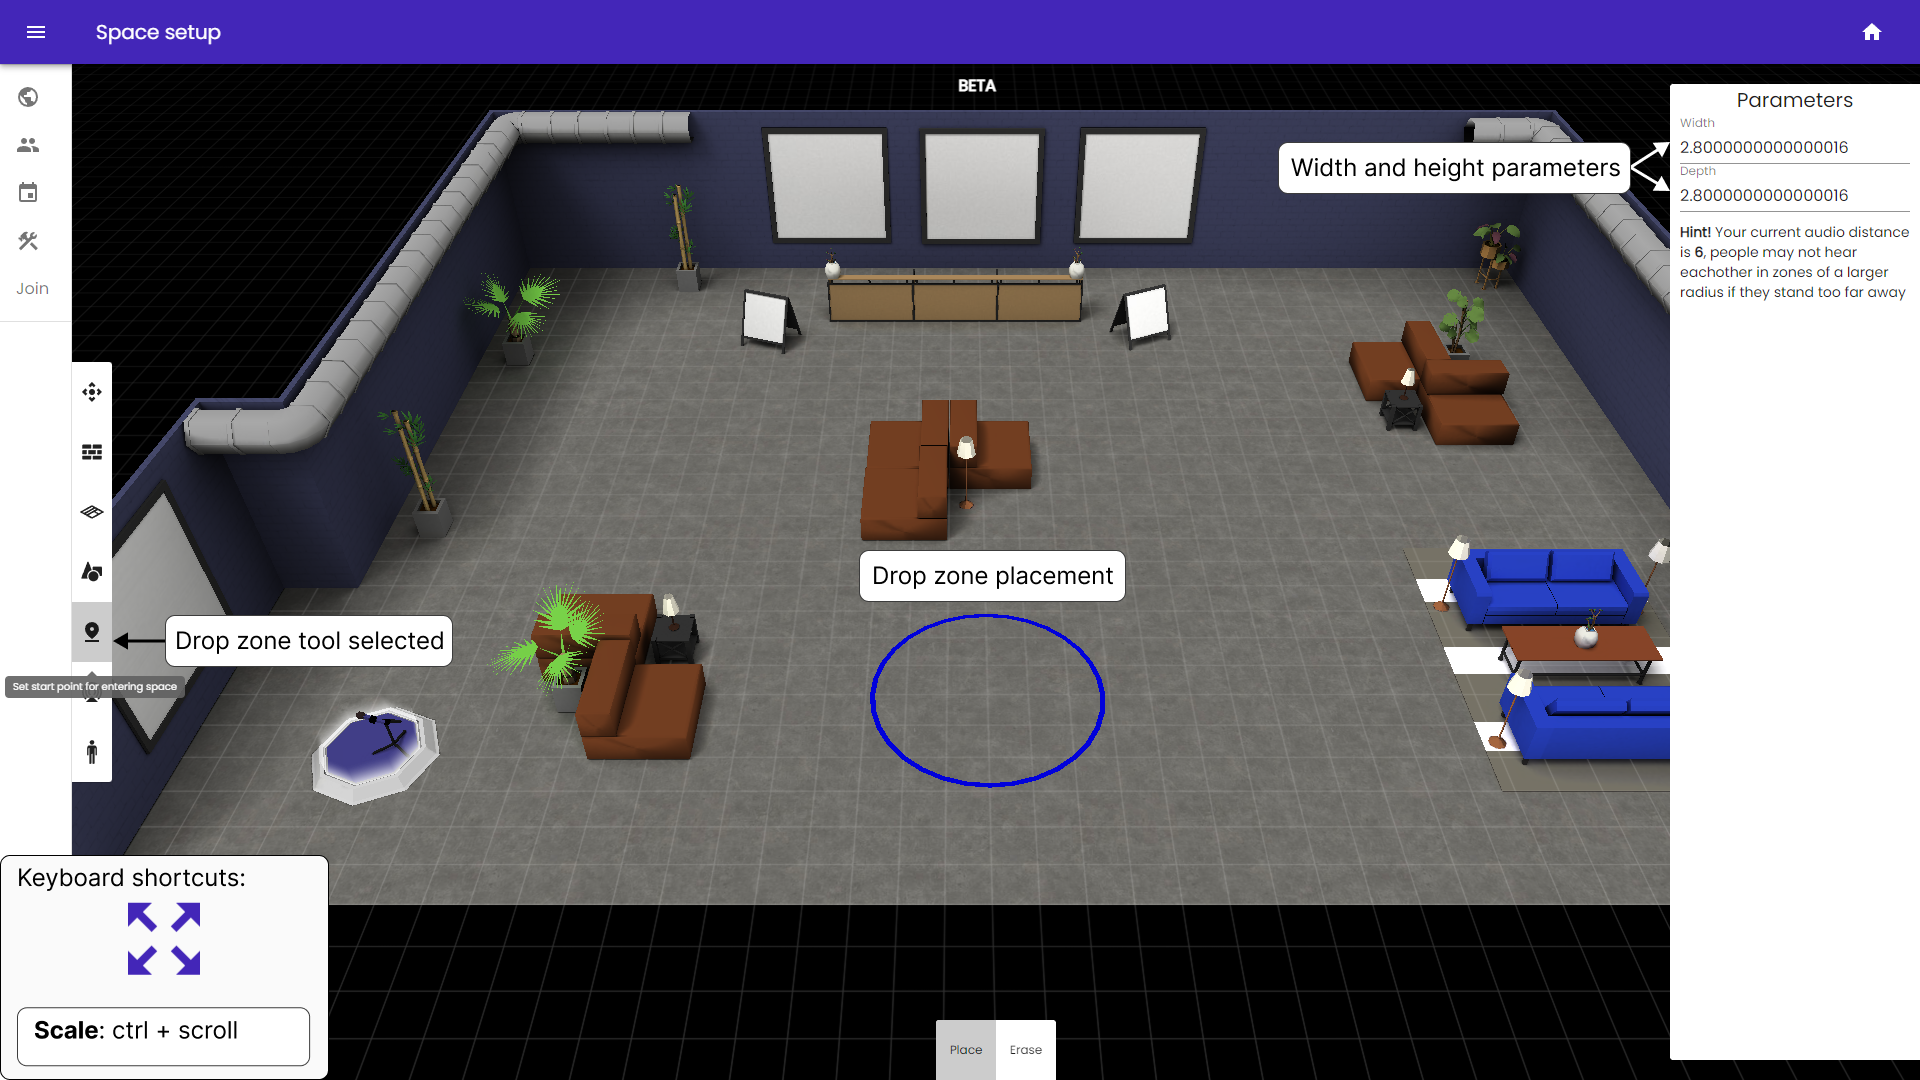
The tool with the drop pin symbol allows you to configure drop zones for your space. This is the area that you, your members, and guests will appear in when you first enter the space. You appear at a random location within the zone you choose. You can edit the width and height of the area to make it as large or as small as you like, the keyboard shortcut for resizing the width and height of the area is ctrl+scroll.
You can’t delete the drop zone, if you want to update it simply place a new one in the desired location.
Audio zones
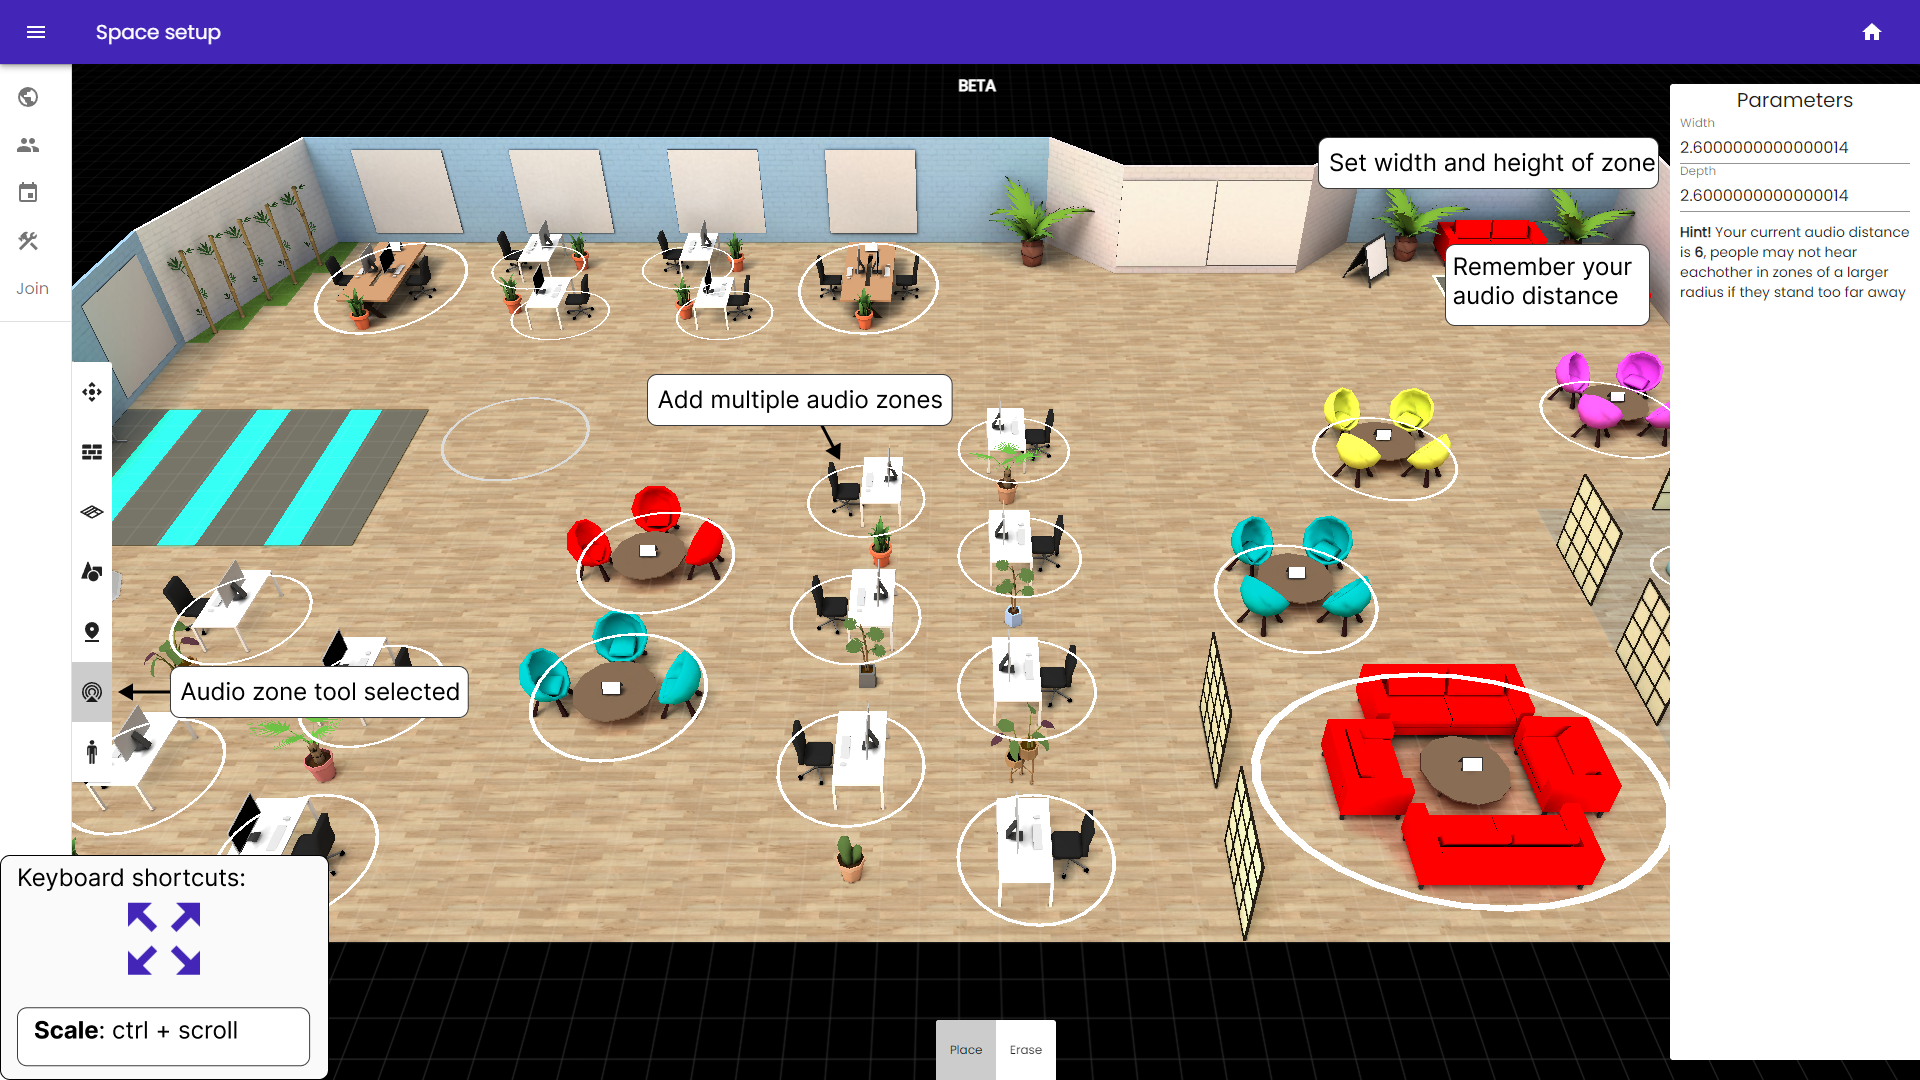
An audio zone is a special area which restricts a user’s ability to transmit and receive audio to the area within the zone. This means that if you are in an audio zone, you will only be able to hear and talk to others within that zone, and, if you are in a zone and another user walks past without joining the zone, they will not join the conversation.
You can place and scale audio zones in the same way as the drop zone described above, and you can create as many as you like! You can also erase audio zones you don’t need anymore by selecting the erase tool and clicking on the audio zone you want to remove.
Important! You can scale up your audio zones as much as you like, but you will only be able to hear other users up to your maximum audio range, so you have an audio zone that is 10 metres wide and your audio distance is 6, you will stop hearing other users once they are over 6 metres away, despite the fact they are in the same zone.
NPCs
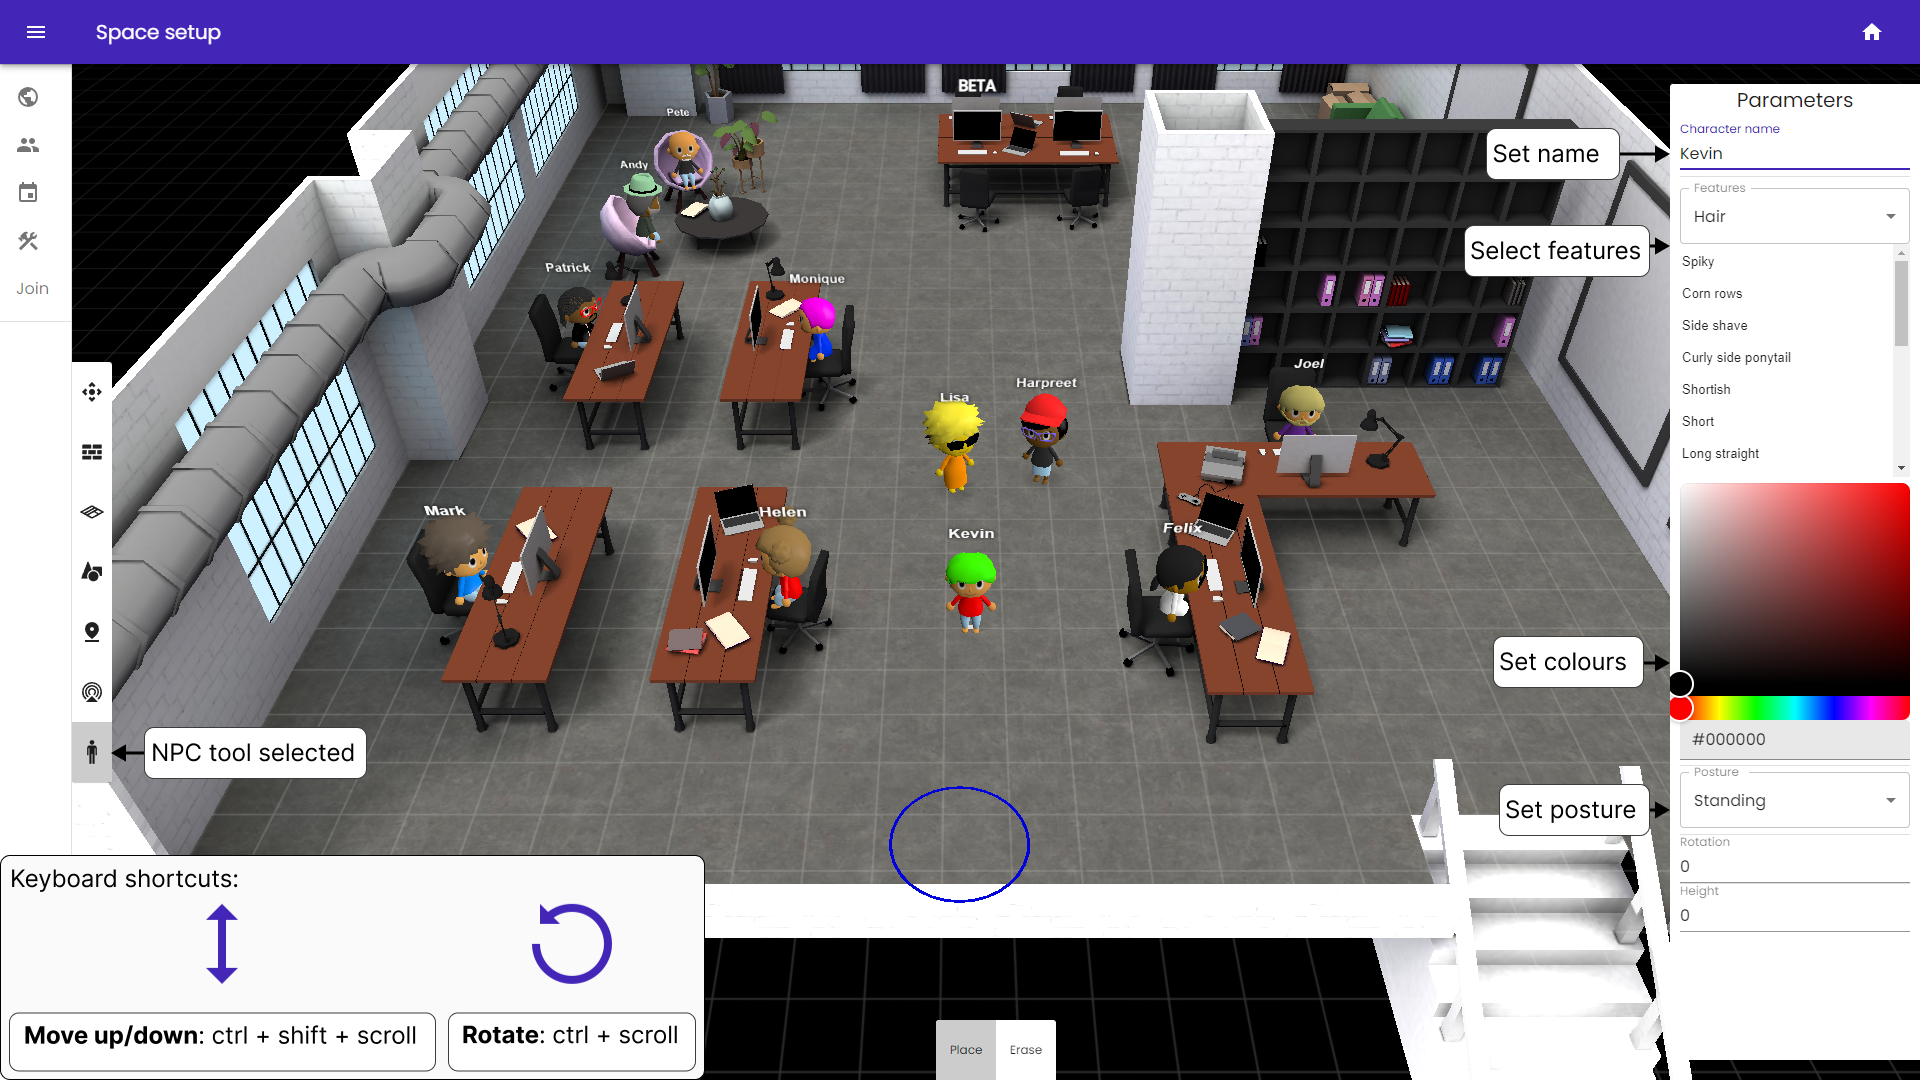
This feature allows you to add “non-playable characters” (NPCs) into your spaces. When you select the NPC tool the side panel allows you to configure each character, in a similar manner to creating your avatar! Once you are happy with your character’s look you can place them anywhere in the space. You can also adjust height (ctrl + shift) and rotation (ctrl) as with the object tool. To delete them simply toggle into the erase tool and click on the character you wish to delete.
NPCs are useful if you want to take screenshots of video of your space with lots of characters in! In future we will be adding more functionality to these guys so stay tuned for that.
And that just about summarises all of the tools within Grapevine space builder. If you have any questions or feedback for us please let us know at [email protected], we’re constantly looking to improve! Information on how to get started with Grapevine can be found here, and information on pricing for commercial users here. Happy building!

