How to create a virtual HQ in Grapevine
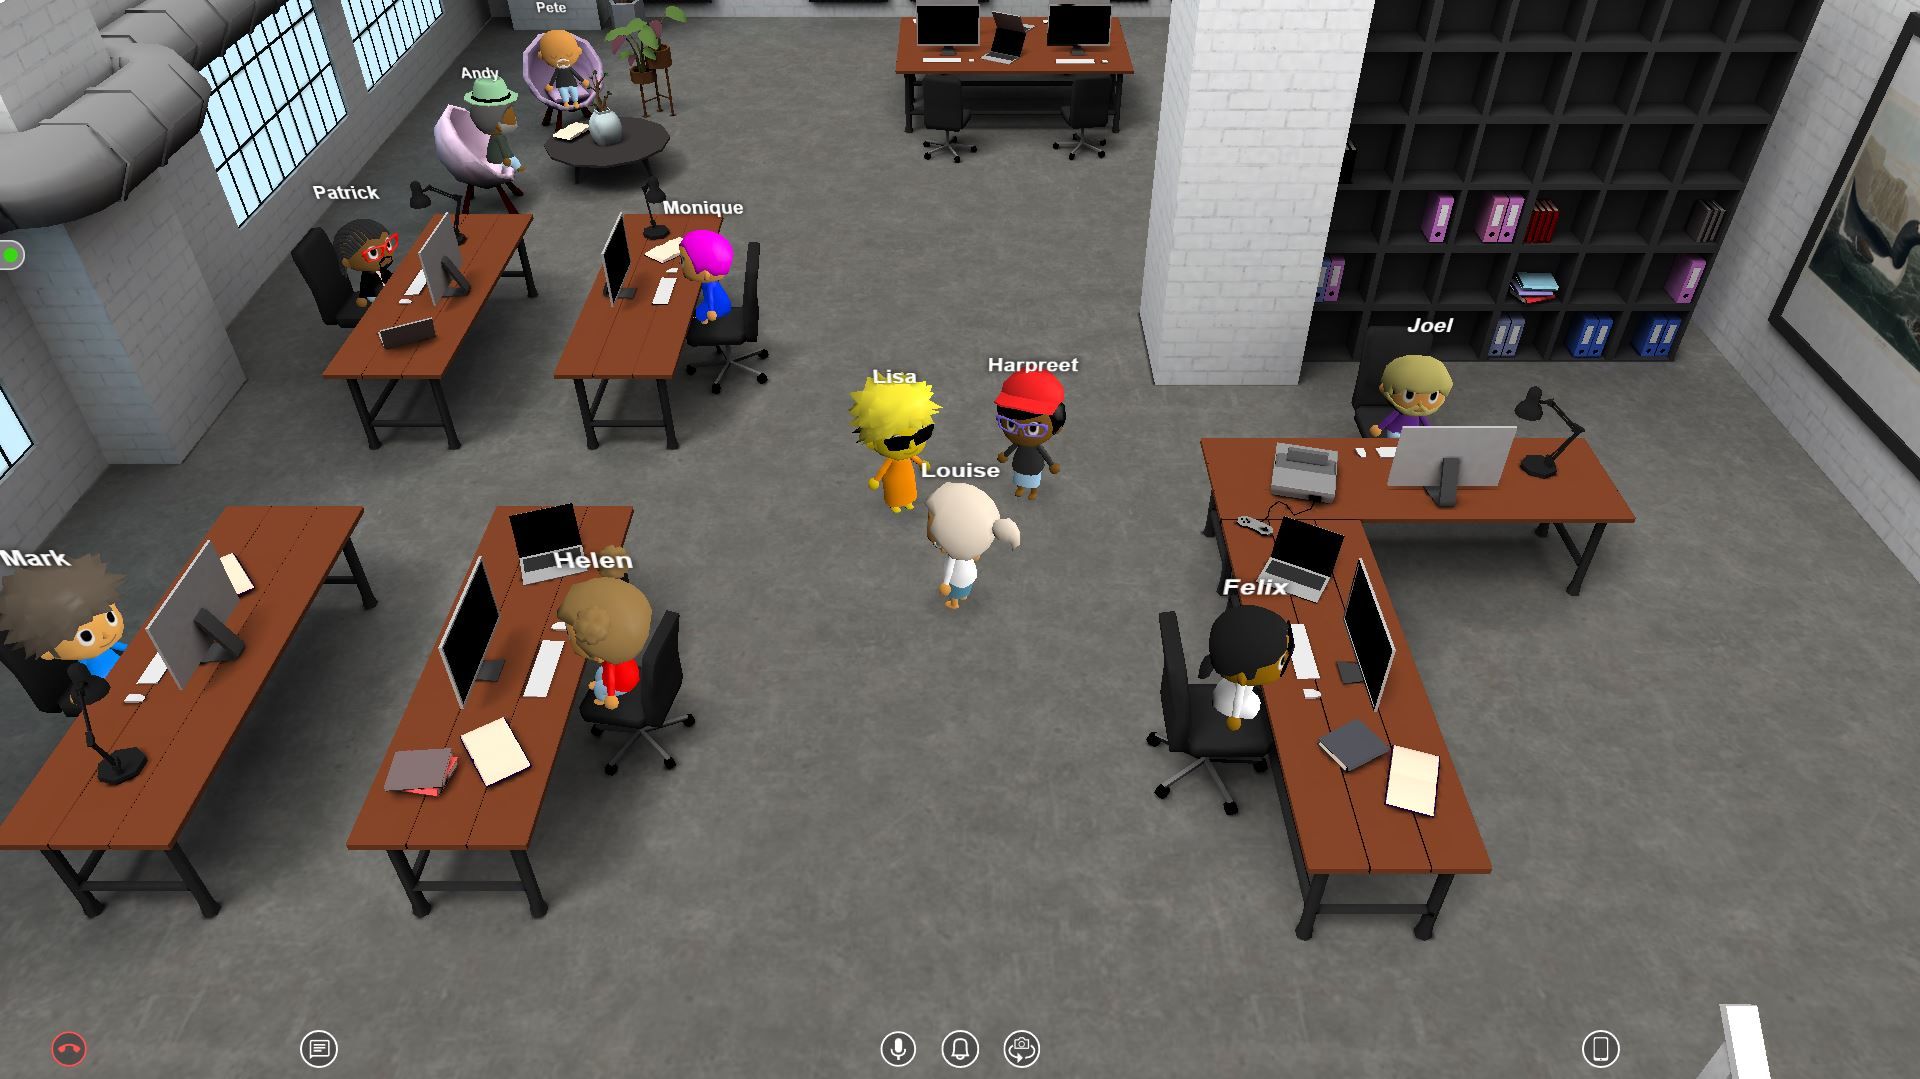
Grapevine is a virtual world for friends, co-workers, and communities, making it the perfect platform for a virtual HQ. Getting started is quick and easy, follow these simple steps to design your own virtual office space.
Step 1 . Sign up and create your avatar 😎
With Grapevine you can sign up and get started for free. Head over to sign up to create an account. On your first sign in you can choose your avatar. Use the sidebar to switch between features and the arrow buttons to try different options. When you're done hit the tick in the top right. You can update your avatar at any time so don’t worry if it’s not perfect!
Step 2 . Create a new space 🛠
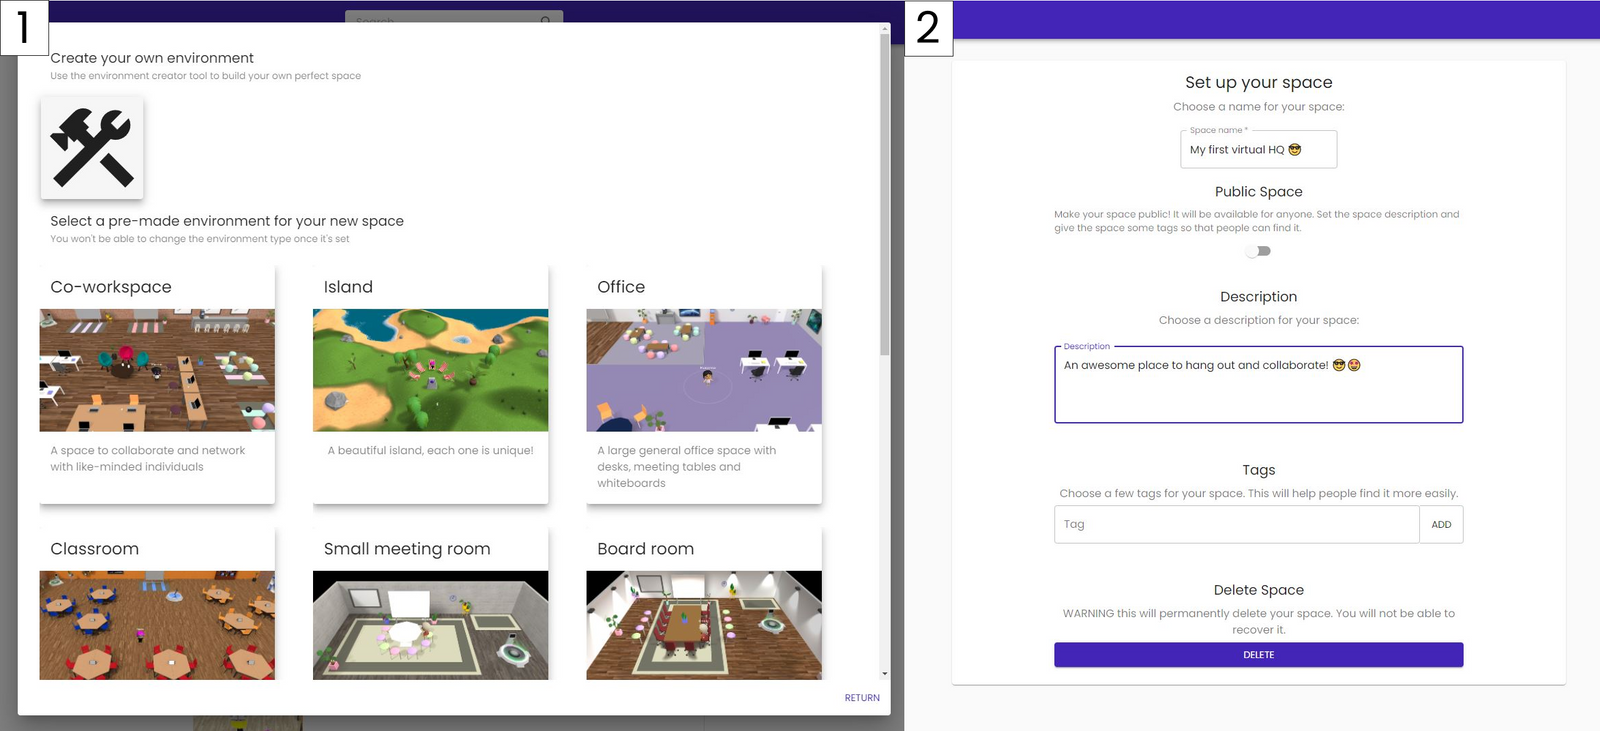
Next you will be navigated to the home screen. Here you can view and enter Grapevine spaces you own or are a member of and you can also search for public spaces. To create your first space hit the big create space button at the top of the screen. Select the builder icon 🛠 on the top left to build your own space. From here you’ll be taken to Space set up where you can add a name and a description to your space**.**
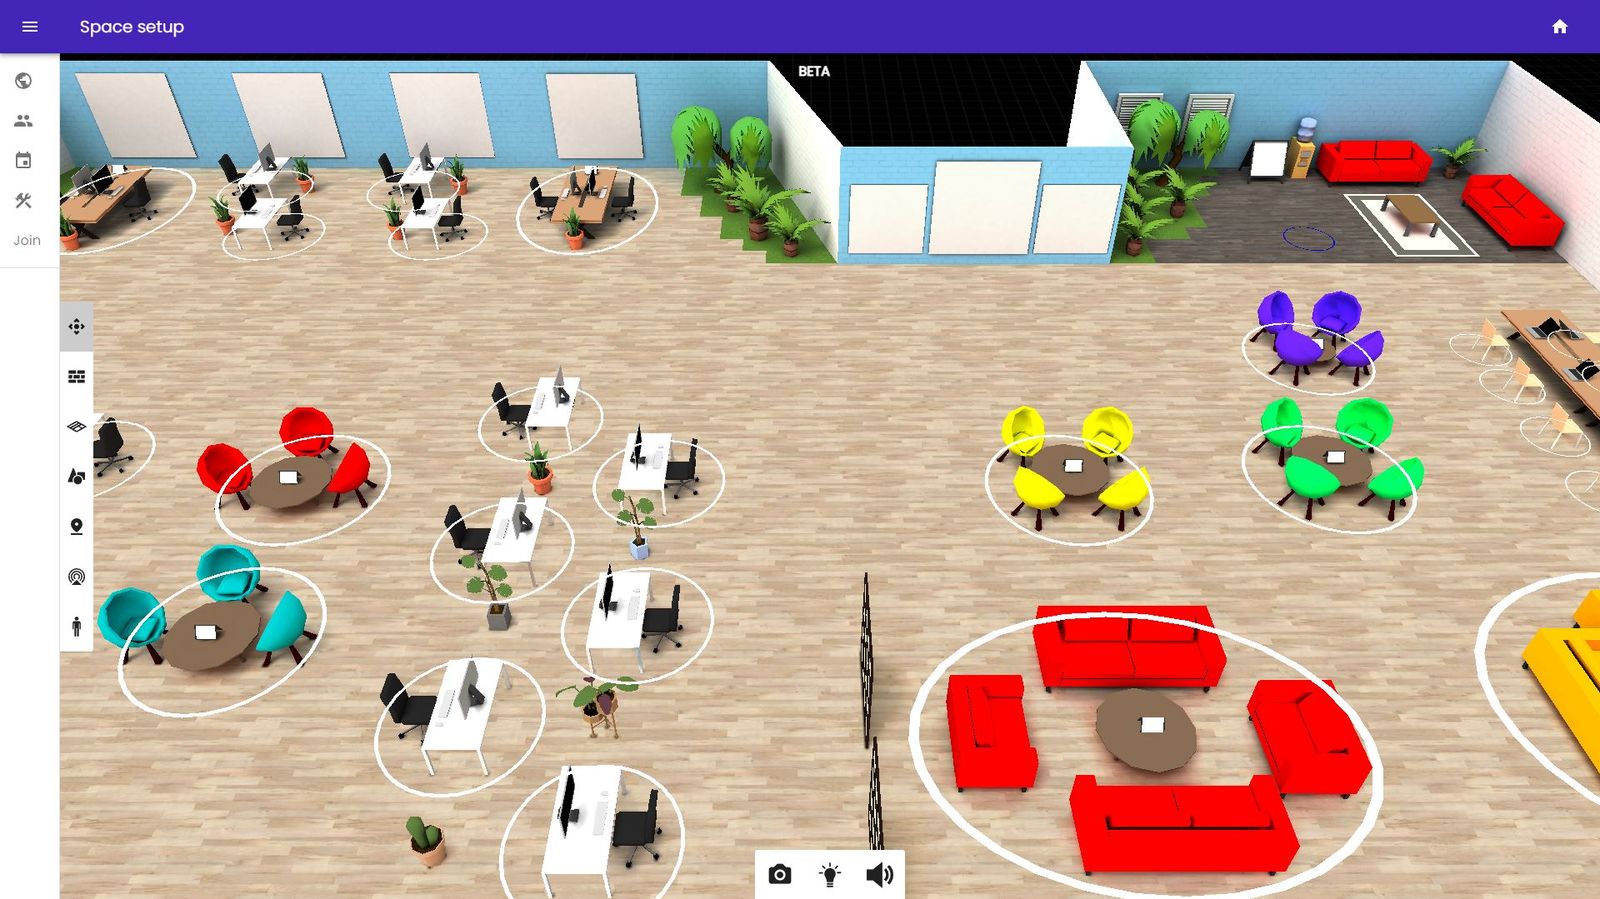
Step 3 . Design your layout 👩🎨
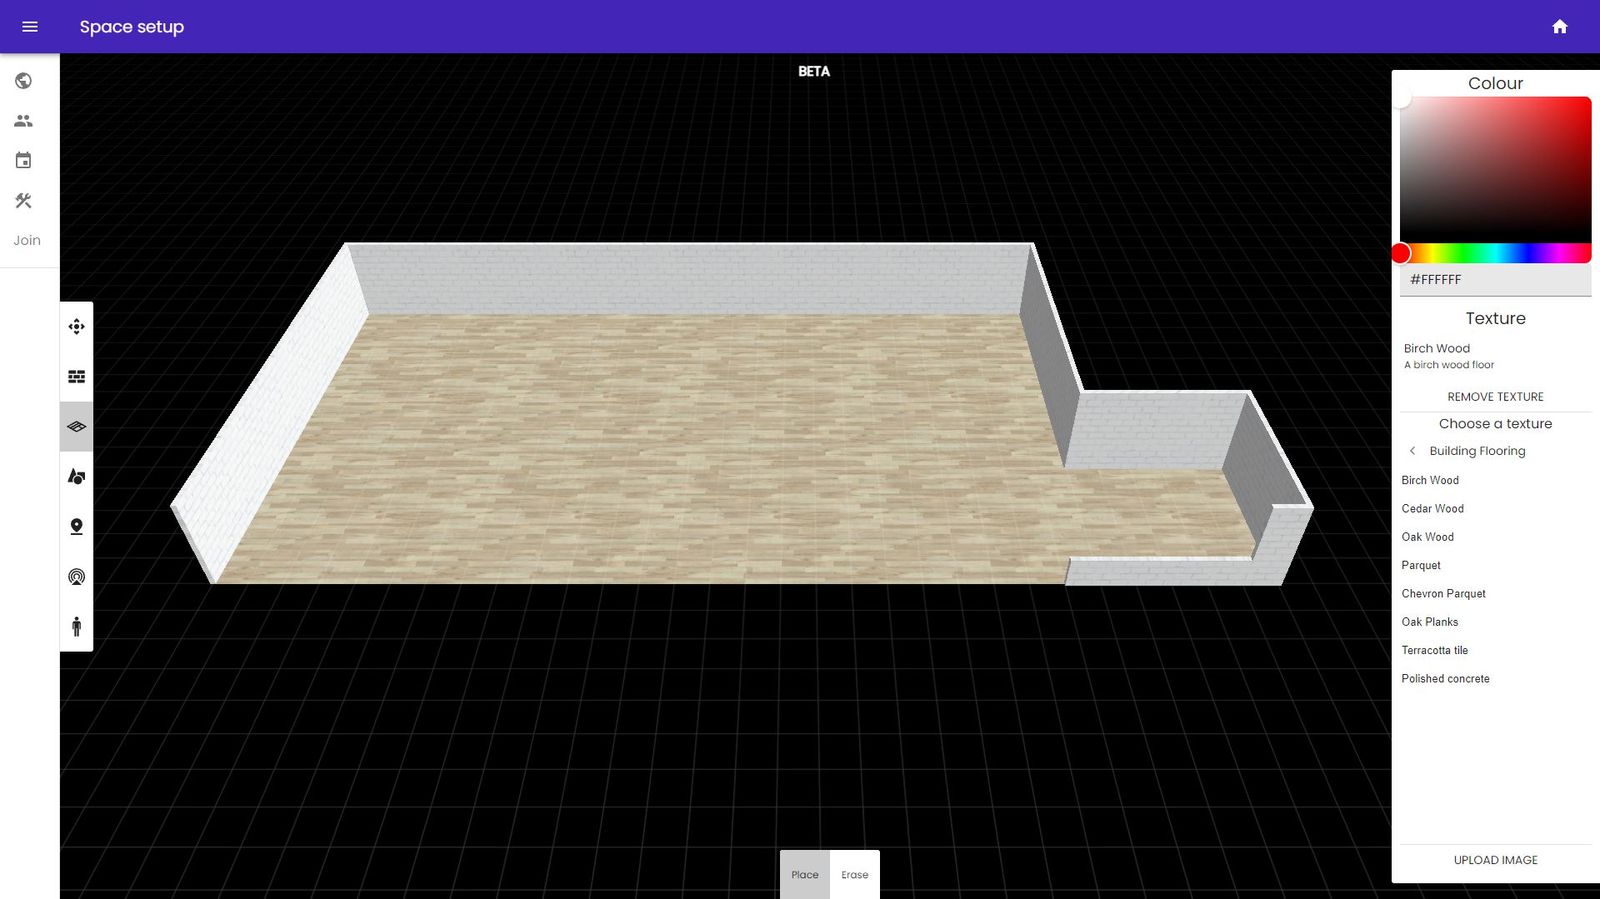
The builder icon 🛠 in the Space set up side panel will take you into Space Builder. This is the fun part! Here you can design the layout of your 3D space. All tools are shown on the left hand tool toggle panel. It’s best to start by adding floors and walls. Then you can add furniture such as chairs, tables and other objects. You can customize every aspect of your layout including colours, textures, size, and rotation of objects. You can jump in and test the space at any time by hitting the JOIN button in the side panel. Take your time and design the perfect space.
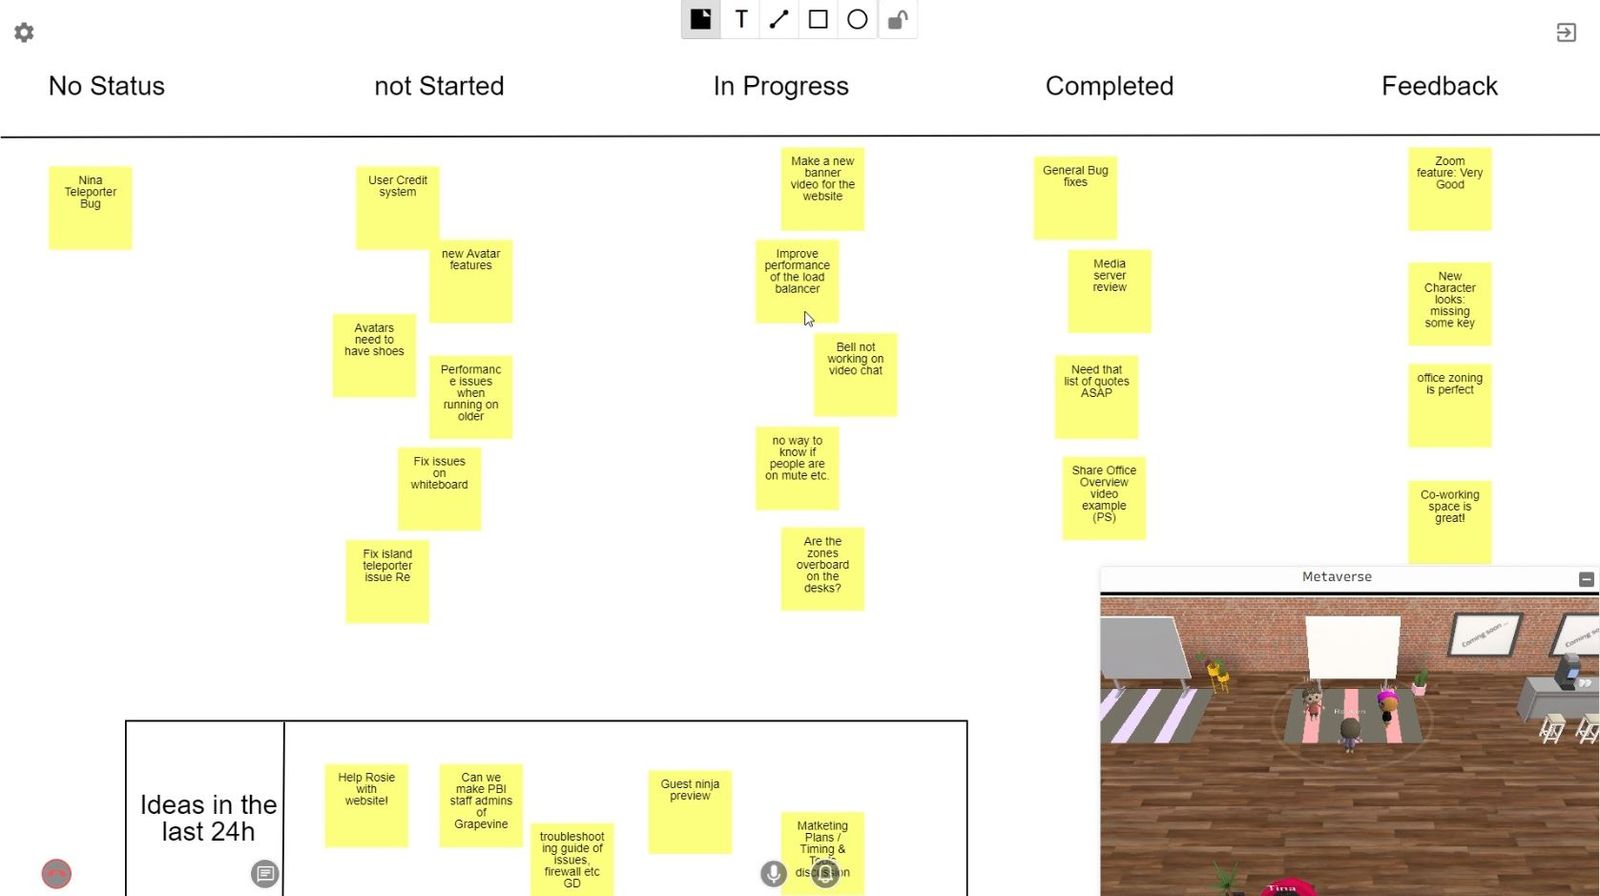
Step 4 . Make it interactive ⚡
Once you’re happy with the layout of your virtual HQ it’s time to add some interactables. These are special objects that are clickable and allow you to add richer functionality to your space. We recommend adding some tablets and whiteboards. These allow screen sharing, video calls and embedded content for virtual collaboration. You can also add picture frames and teleporters!
Step 5 . Finishing touches 💡
To make your office really stand out you might want to try baking in realistic lighting using our lighting tool. Hit the little lightbulb and set your lighting parameters. This is an experimental feature so it may take a couple of minutes to run, stick the kettle on while you wait!
Step 6. Add your brand ♥
If you added picture frames to your layout jump into your new HQ and click on the frame to add photos and hyperlinks. Add your company logo, website, socials, mission statement, awards, team photos,... Go crazy!
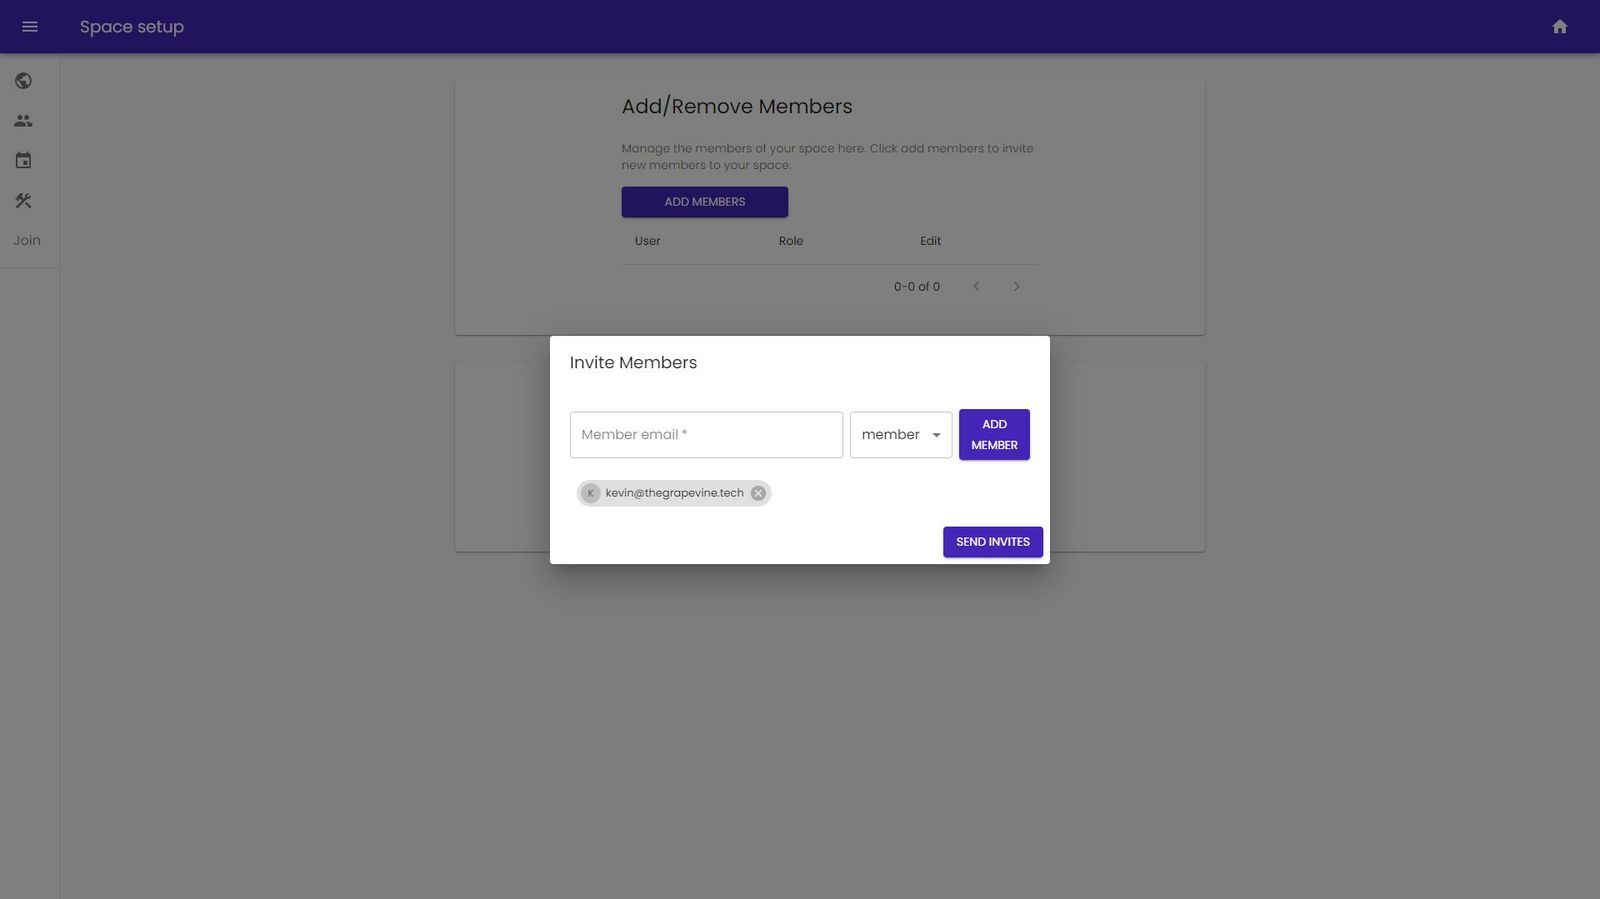
Step 7. Invite your team 💪
Now it’s time to invite your team. Head to the members section in Space set up and add some members by adding their email addresses. Once you hit send invites each team member will receive an invitation email inviting them to set up an account and join the space.
That's it! You’re now ready to start using your new virtual HQ!
Our pricing is simple, check out our pricing page to learn more. If you would love a virtual HQ but time is not on your side, get in touch and we can build you your dream virtual space!